
How to Build a Vacuum Ski Press Frame
Building your own vacuum press is the first step in setting up a custom ski workshop. A well-constructed frame allows you to achieve consistent results when laminating ski layups. Below is a detailed, step-by-step guide for building a reliable and airtight vacuum press using readily available materials.
Materials Needed:
- Melamine sheet – forms the airtight table surface.
- Table base – wood studs or recycled cabinet bases.
- 40x20mm aluminum extrusion – for the top clamping frame.
- Corner hardware & slot covers – used to secure the silicone and stiffen the frame.
- 1mm thick silicone sheet – creates the flexible vacuum membrane.
- Toggle latches – for clamping the top frame tightly to the table.
- Door hinges – to allow the frame to swing open from the back.
- Gasket sealing tape – available from suppliers like VeneerSupplies.com. For sealing the tabletop against the frame, creating an airtight compartment.
- Construction screws, wood glue, and silicone caulk – for assembly and airtight sealing.
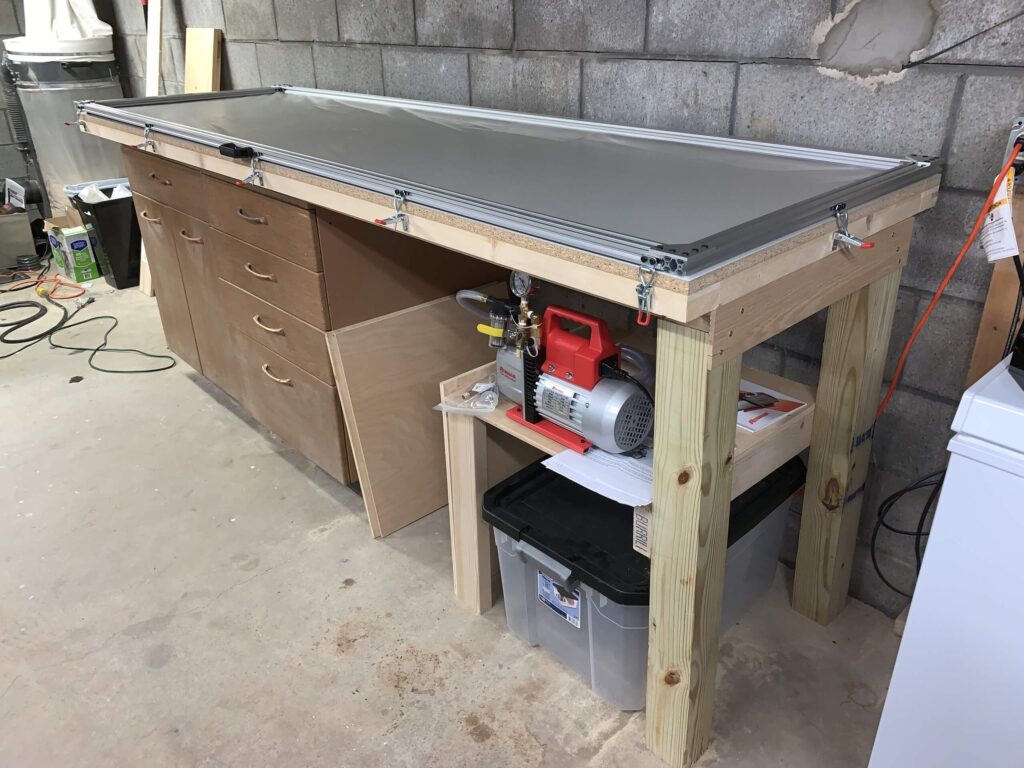
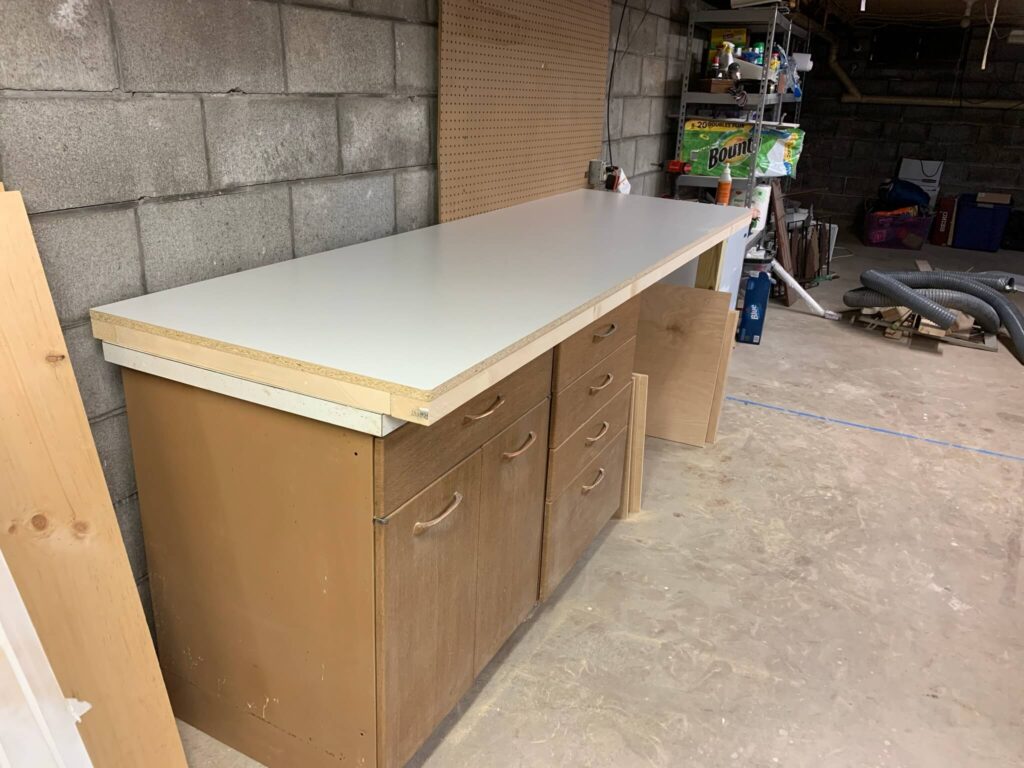
Step 1: Build the Tabletop
Start by constructing a flat and sturdy work table using wood studs or old cabinet bases. Attach a melamine sheet to the top surface. Melamine is ideal because it’s smooth, rigid, and most importantly airtight. This will serve as the vacuum plenum and pressing surface.
Step 2: Assemble the Aluminum Extrusion Frame
Next, build a rectangular frame using 40x20mm aluminum extrusion. Use corner brackets and hardware to create a rigid structure. This frame will serve as the clamping lid that holds the silicone sheet and gasket in place during pressing.
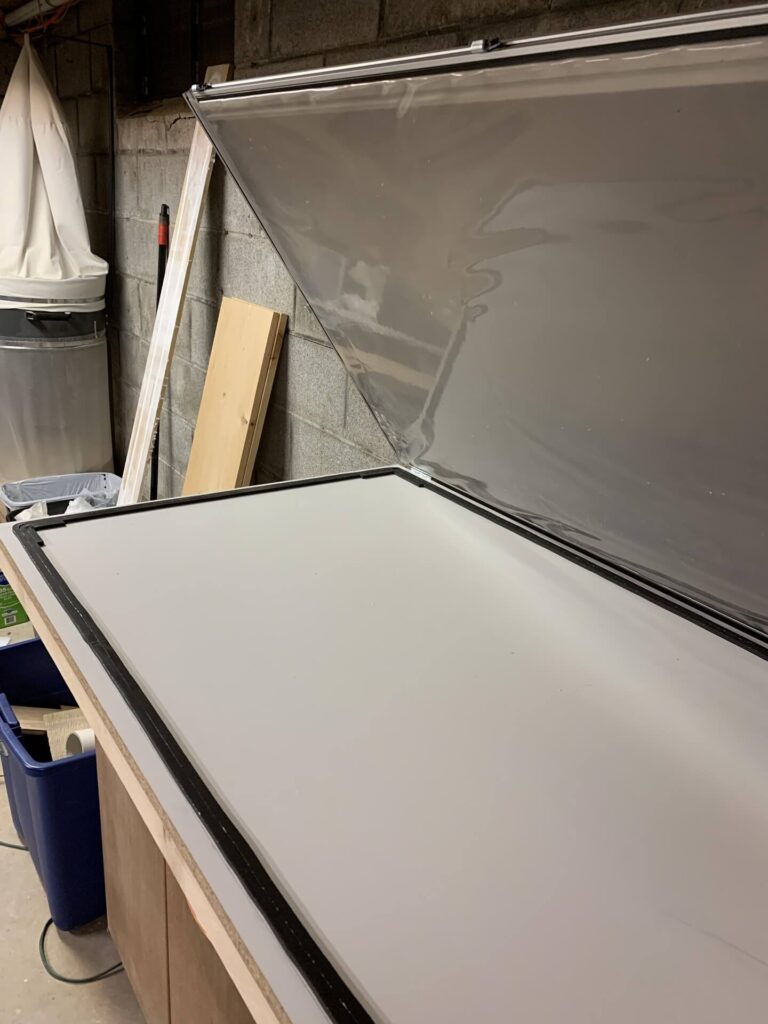
Step 3: Attach the Silicone Sheet
Cut the 1mm silicone sheet to size so that it completely covers the interior of the extrusion frame. Use slot covers or press-in bars to trap the edges of the silicone sheet in the extrusion channels. This method creates a clean, sealed perimeter without puncturing the silicone.
Step 4: Apply Gasket Sealing Tape
Install the gasket sealing tape around the inside perimeter of the frame where it will contact the melamine surface. This tape ensures an airtight seal when the frame is closed and the vacuum is applied.
Step 5: Install Hinges and Toggle Latches
Mount door hinges along the back side of the frame, attaching it to the rear edge of the tabletop. This allows the top frame to lift open like a lid. Then, install toggle latches along the front and sides to securely clamp the frame down during use, compressing the gasket for a tight seal.
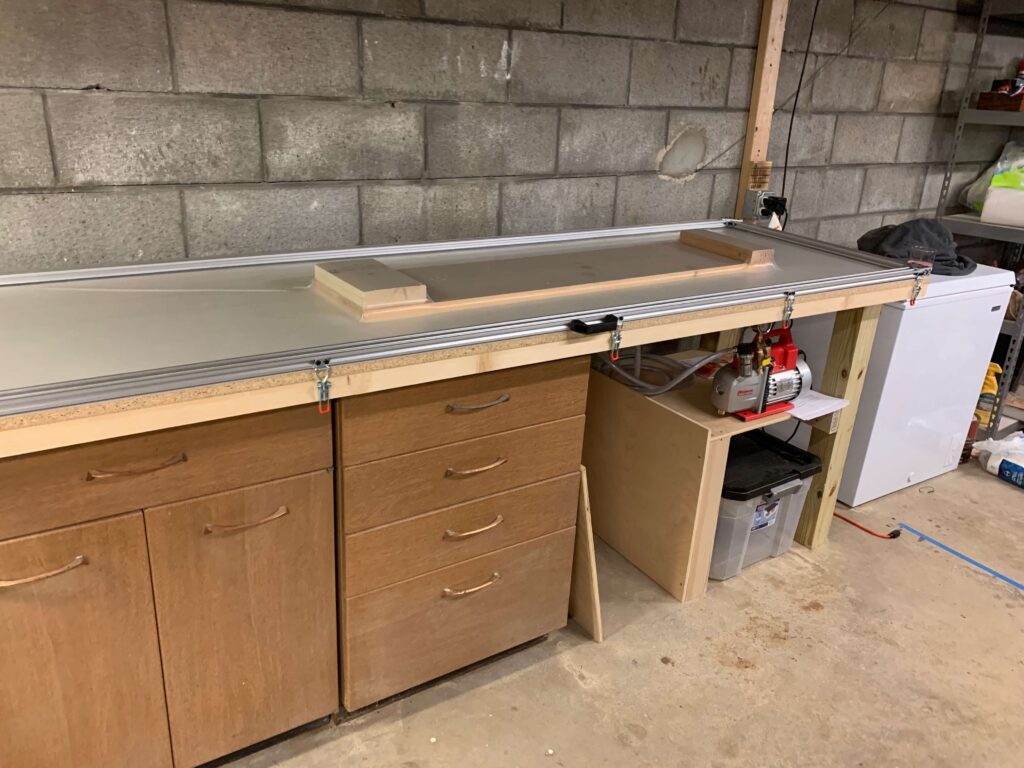
Step 6: Drill and Seal the Vacuum Port
Drill a small hole in the center (or edge) of the melamine table—this will serve as the vacuum inlet. Install a vacuum port fitting and thoroughly seal around it with high-quality silicone caulk. Make sure the connection is completely airtight.
Step 7: Test the System
Before using the press for ski building, test for vacuum integrity. Connect your vacuum pump to the port and run it with the frame clamped shut. Listen for leaks and inspect for weak spots in the seal. The silicone sheet should draw down firmly over the mold and ski layup when everything is working properly.
Tips for Success
- Double-check all gasket seams for gaps or compression issues.
- Add breather mesh and peel ply to your layup to improve vacuum distribution.
- Reinforce the table with cross-beams beneath the melamine surface so it stays flat while supporting the weight of the mold and layup.
With this setup, you’ll have a powerful and repeatable tool for pressing skis, snowboards, and other composite layups.