
How to Pour Sidewalls for Ski and Snowboard Cores
Sidewalls are needed to protect the wood core from moisture. While some builders laminate ABS plastic strips onto their cores, another reliable method is to pour liquid urethane resin directly into sidewall channels. This creates a clean bond and a solid, colorful sidewall. The reason I prefer it is because it allows the sidewalls to be continuous around the entire build and the wood core to extend into the tip and tail, giving a nice consistent color to the sidewalls without the need to use spacers. The tip and tail will be more durable since it is one continuous piece attached to the core.
This guide walks through how to pour sidewalls using Smooth-Cast 300 or similar casting resin. It’s important that the sidewall material is a shore hardness of about 70 D so that it can absorb impacts and vibrations without cracking.
Materials and Tools
- Ski core blanks
- Router
- Plastic sheeting (to protect your bench from spills)
- Smooth-Cast 300 resin (or equivalent 2-part urethane)
- Pigment dye (urethane-compatible)
- Mixing cups & stirring sticks
- Digital scale (for precise mixing by weight)
- Planer or jointer for cleanup
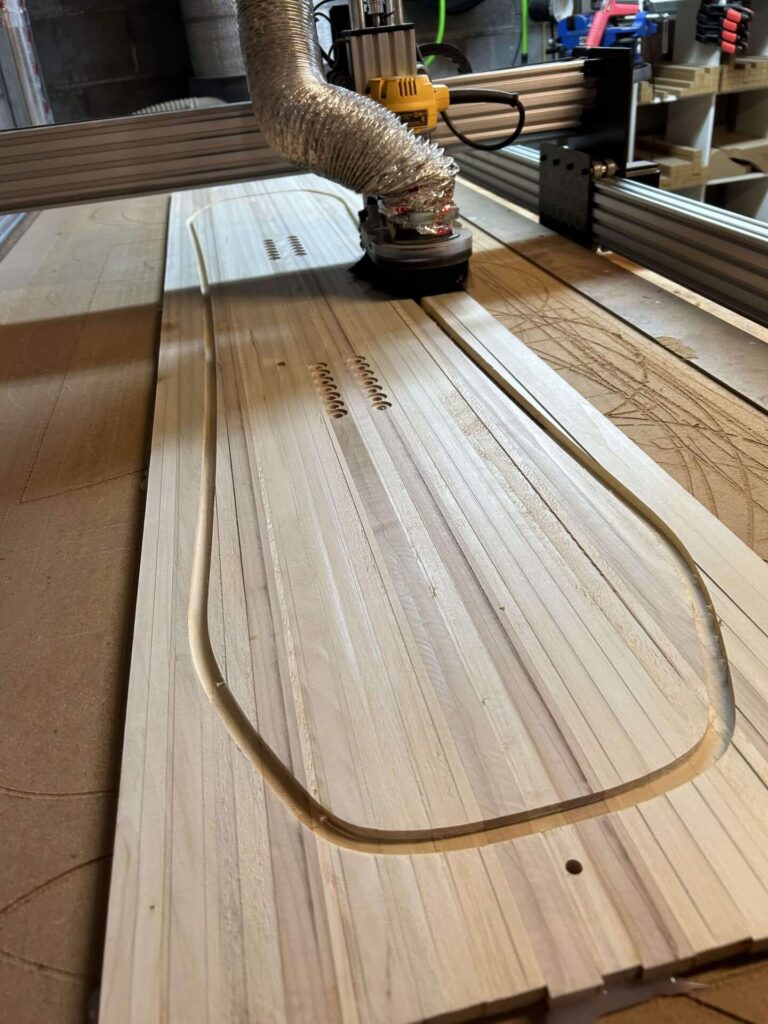
Step 1 – Prepare the Core
- Route out sidewall channels and place the core with sidewall channels face-up on plastic sheeting.
- The sidewall channels should be a few millimeters wider than your finished board all around to allow a little bit of offcut when finishing.
- Make sure the channels are clean and dry before pouring.
Step 2 – Measure and Mix Resin
- Weigh out an appropriate amount of Smooth-Cast 300.
- For an average-sized ski (160 cm), this is about 460 grams combined (Part A + Part B).
- Adjust the quantity up or down depending on ski length and sidewall depth.
- Add pigment dye to the mix for color.
- Note the amount you use so the second ski will match.
- Remember: Smooth-Cast dries white, so your mixed liquid should be darker than the final color you want.
- If unsure about the color, pour a small test puck and let it cure before committing.
Step 3 – Pour the Sidewalls
- Mix the two resin parts thoroughly. Stir quickly but well.
- Working time is short — once mixed, immediately pour resin into the sidewall channels.
- Fill each channel fully and allow the resin to self-level.
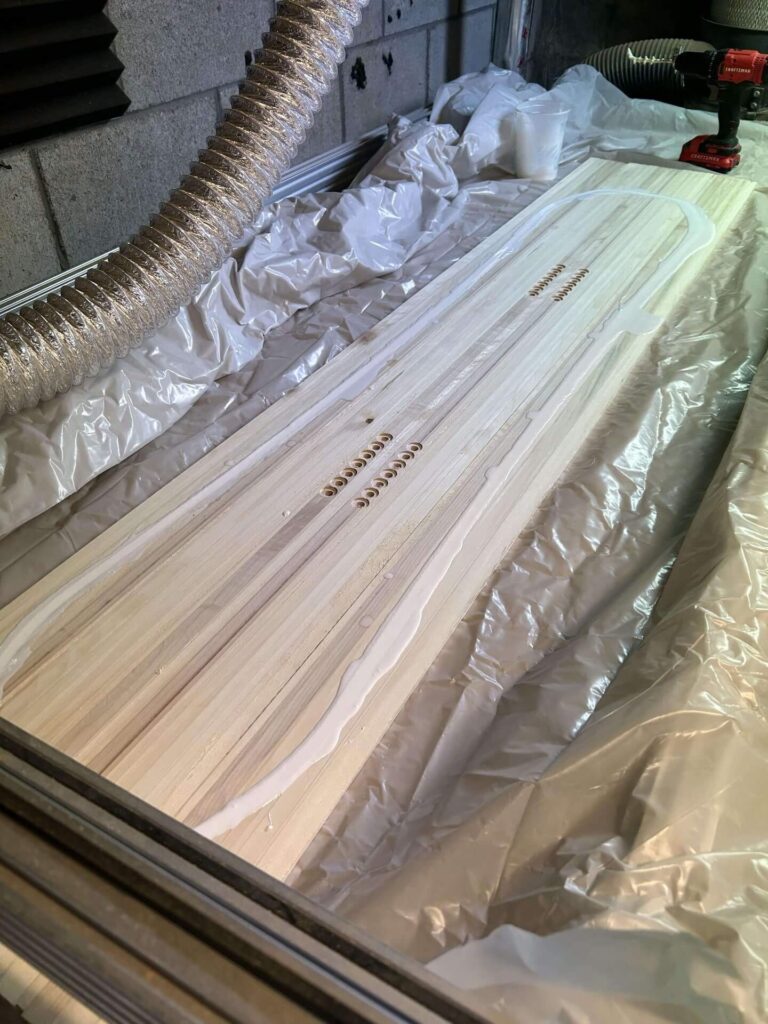
Step 4 – Cure and Clean Up
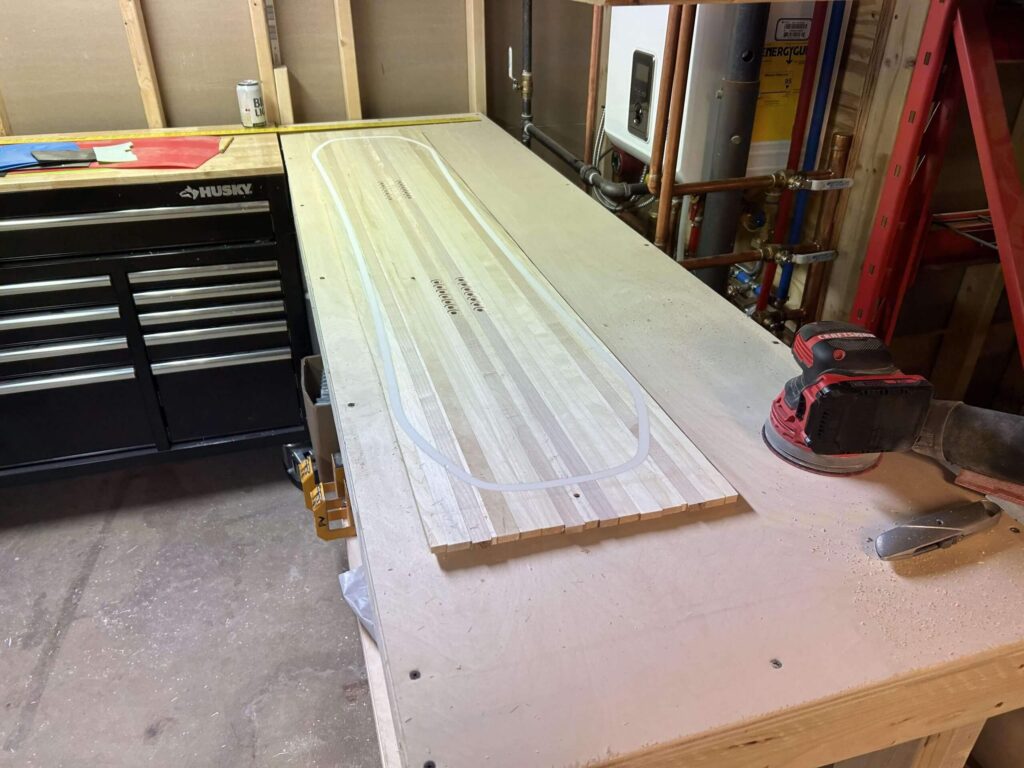
- Allow the resin to cure until fully hardened.
- Once set, use a planer or jointer to remove excess resin and level the sidewalls flush with the wood core.
- This now becomes the bottom surface of the core, ready for profiling and further ski construction.
Tips for Success
- Color Matching: Always measure your dye amounts carefully for consistent results across both skis.
- Temperature: Resin cures best at room temperature. Avoid cold shop conditions.
- Speed: Work efficiently — Smooth-Cast has a short pot life. Prepare everything before mixing.
- Alternatives: Some builders prefer ABS plastic sidewalls, laminated to the core instead of poured. They’re tough and proven, but require different tools and gluing methods.
Once the sidewalls are poured and planed flush, your cores are ready for the next step: profiling the core thickness taper and eventually adding inserts for bindings.