
How to Laminate Ski Cores
Most skis use laminated strips of hardwood glued together into a block, which is then shaped into the core profile. This is done because laminated wooden strips increase the consistency and strength of the core. This guide walks through the lamination process step by step. For skis, the cores should be book matched so that each ski has similar and symmetrical characteristics.
Materials and Tools
- 1×6 hardwood boards (straight, knot-free)
- Wood glue
- Bar & Spring clamps (a lot of them)
- Bandsaw with resaw blade
- Table saw
- Thickness planer
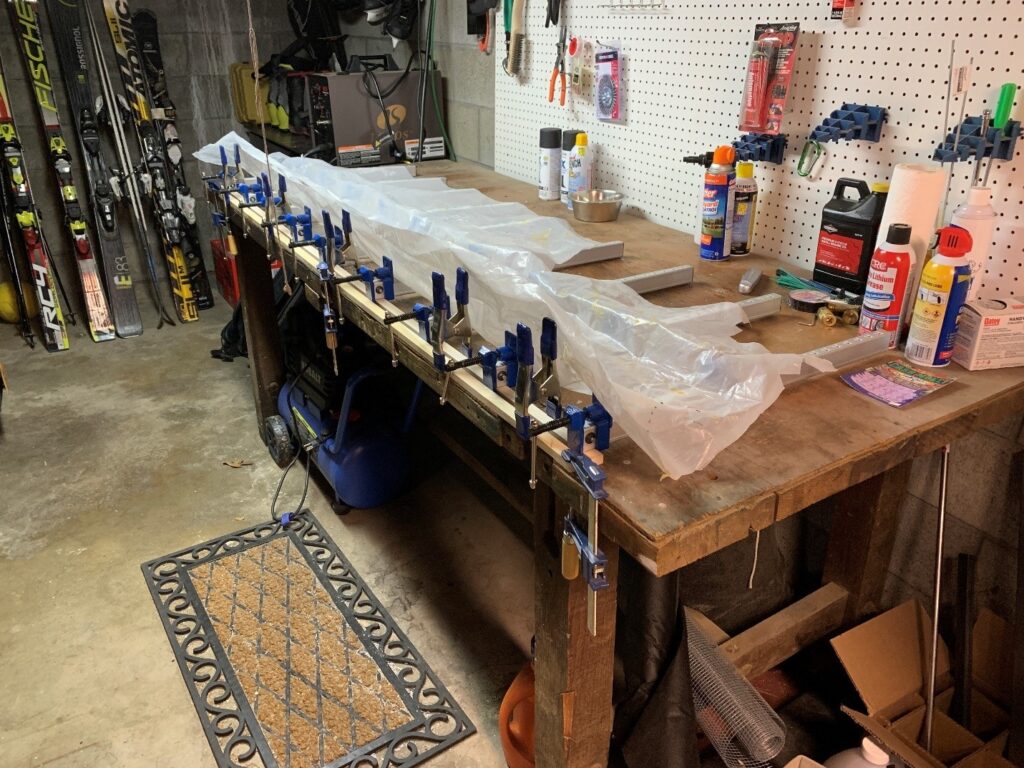
Step 1: Set Up the Clamp Jig
- Secure a thin strip of wood along the lip of your workbench using three vertical bar clamps.
- Position horizontal bar clamps against the strip of wood, evenly spaced across the surface.
- Place a second piece of wood behind the front plate of the horizontal clamps. Use spring clamps to sandwich the horizontal clamps securely.
- Adjust all bar clamps so they are the same width — wide enough to fit your planned lamination.
- Cover the clamps with plastic sheeting to prevent glue drip and buildup.
Step 2: Stack and Glue the Boards
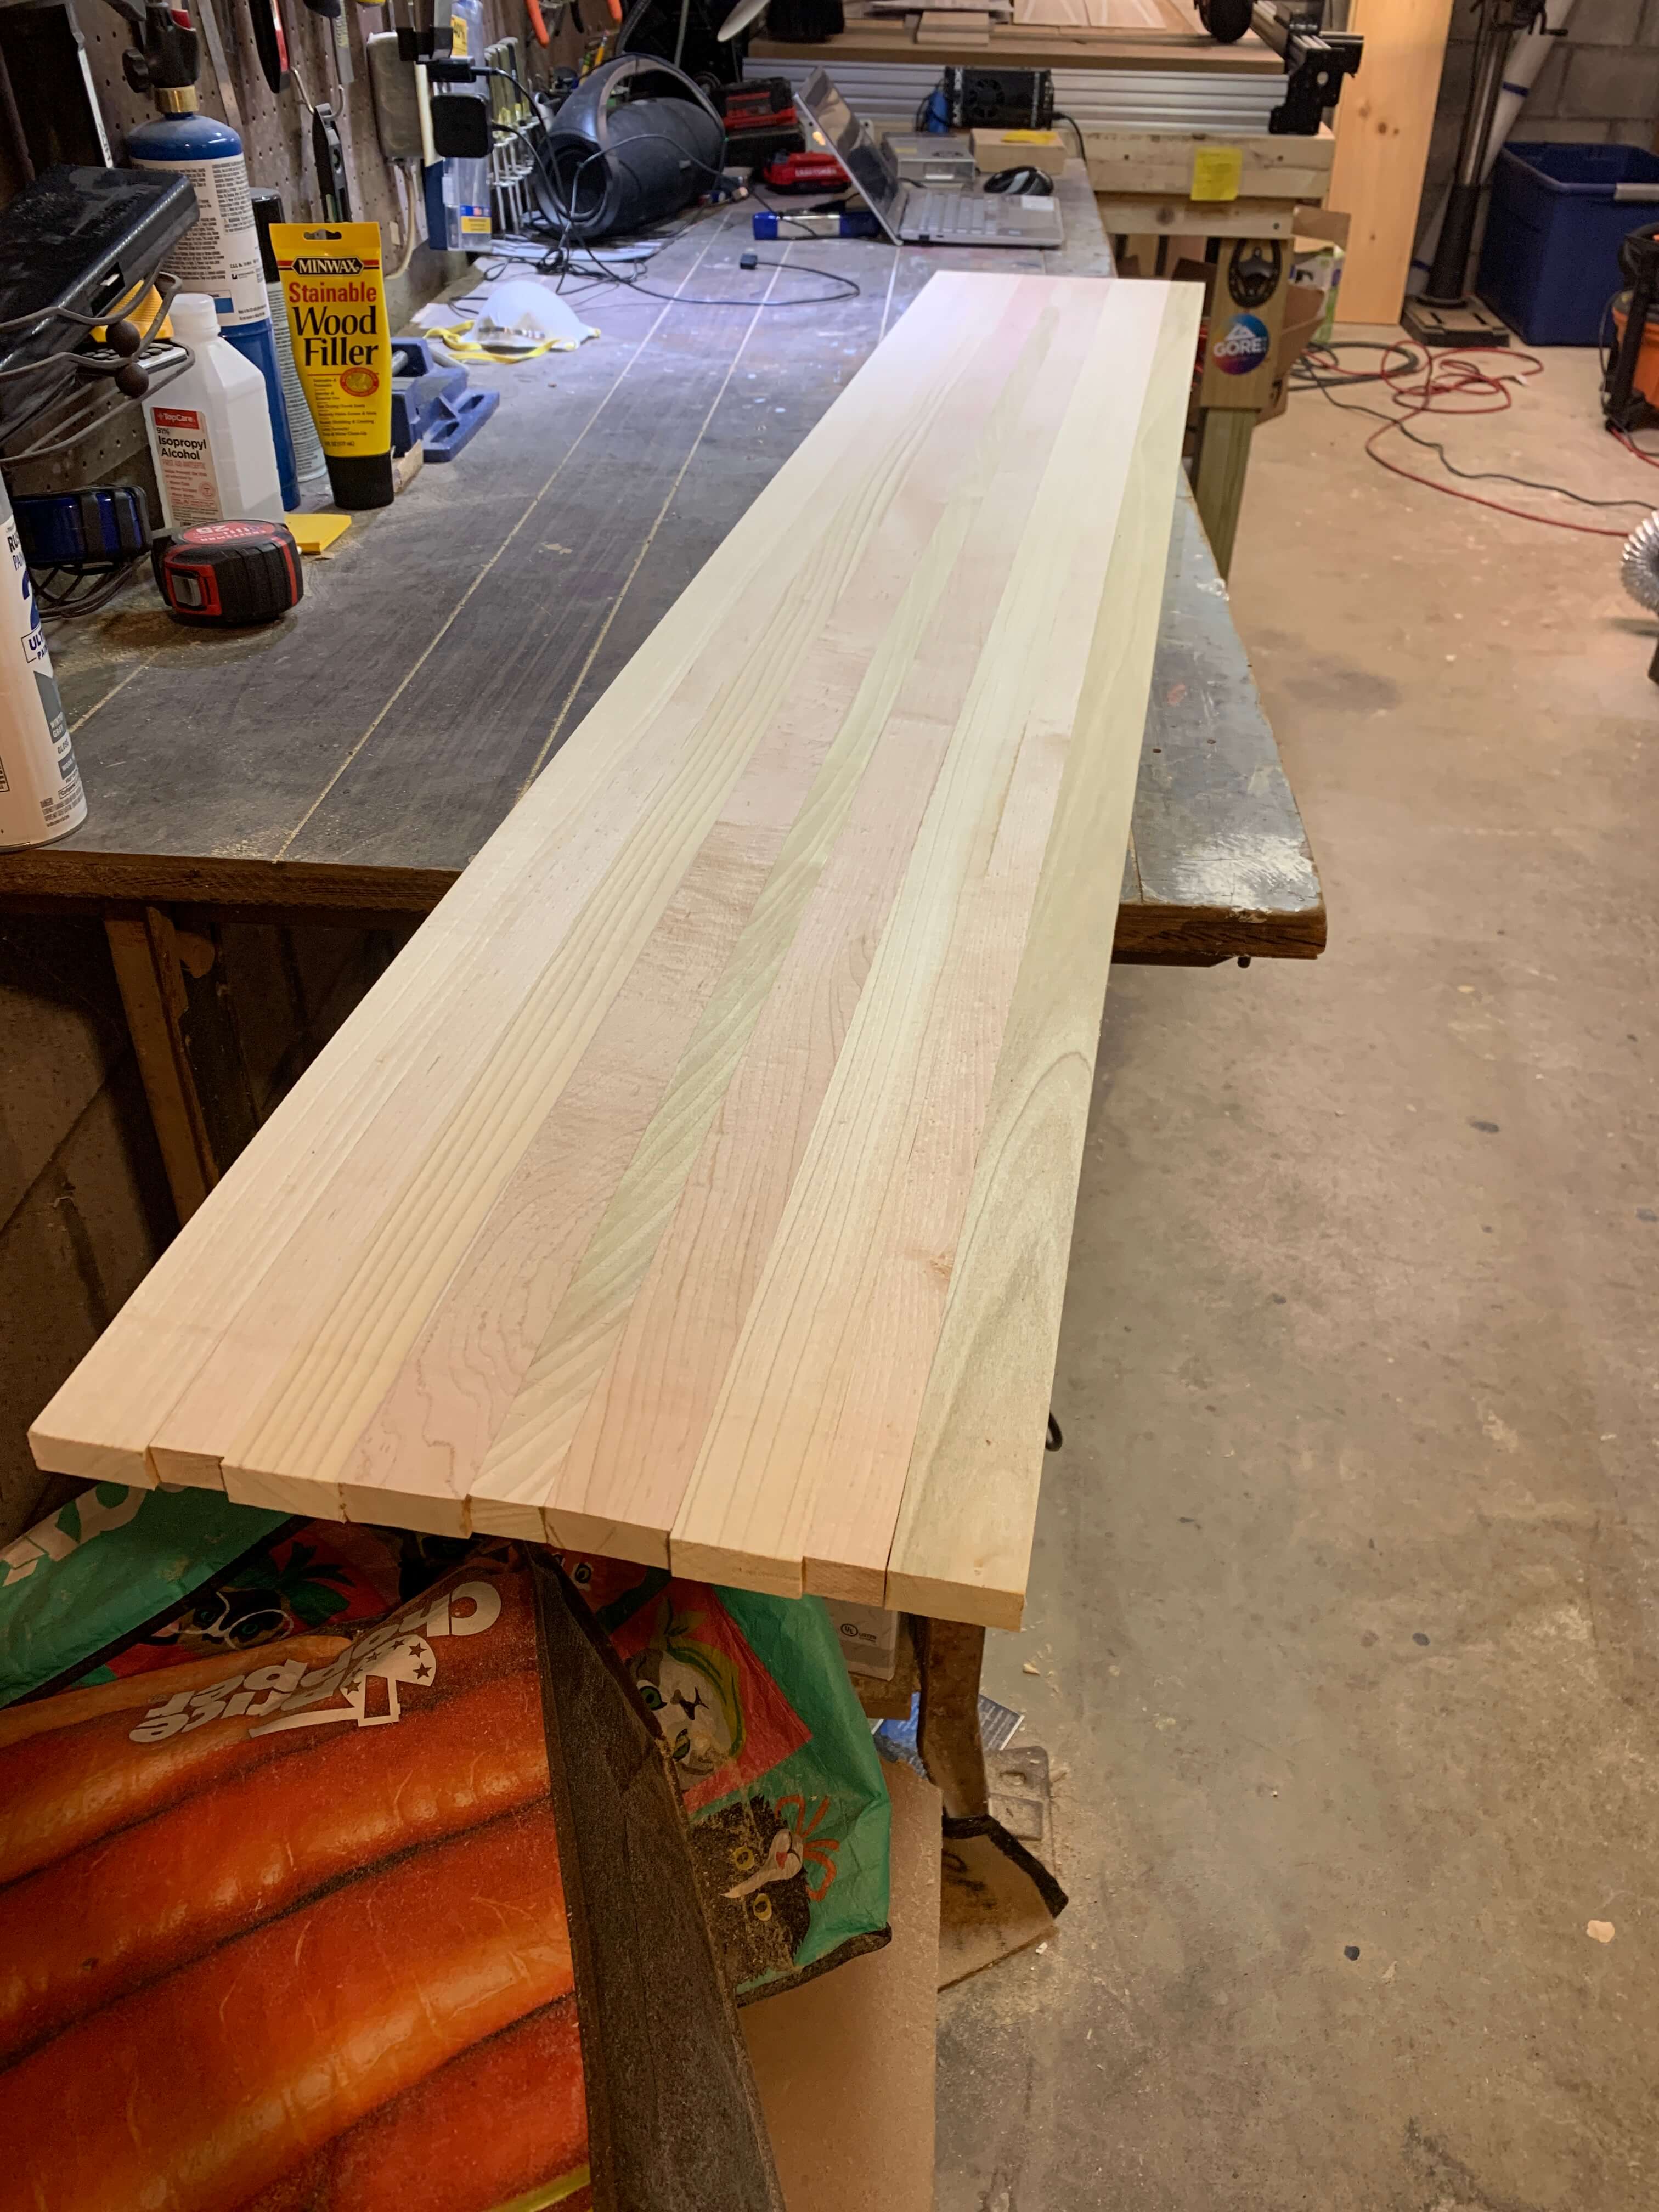
- Arrange your 1×6 hardwoods in the order you want for the ski core.
- Check that boards are knot-free and warp-free.
- Coat the surface of each piece generously with wood glue.
- Place each glued board into the clamp jig, stacking as you go.
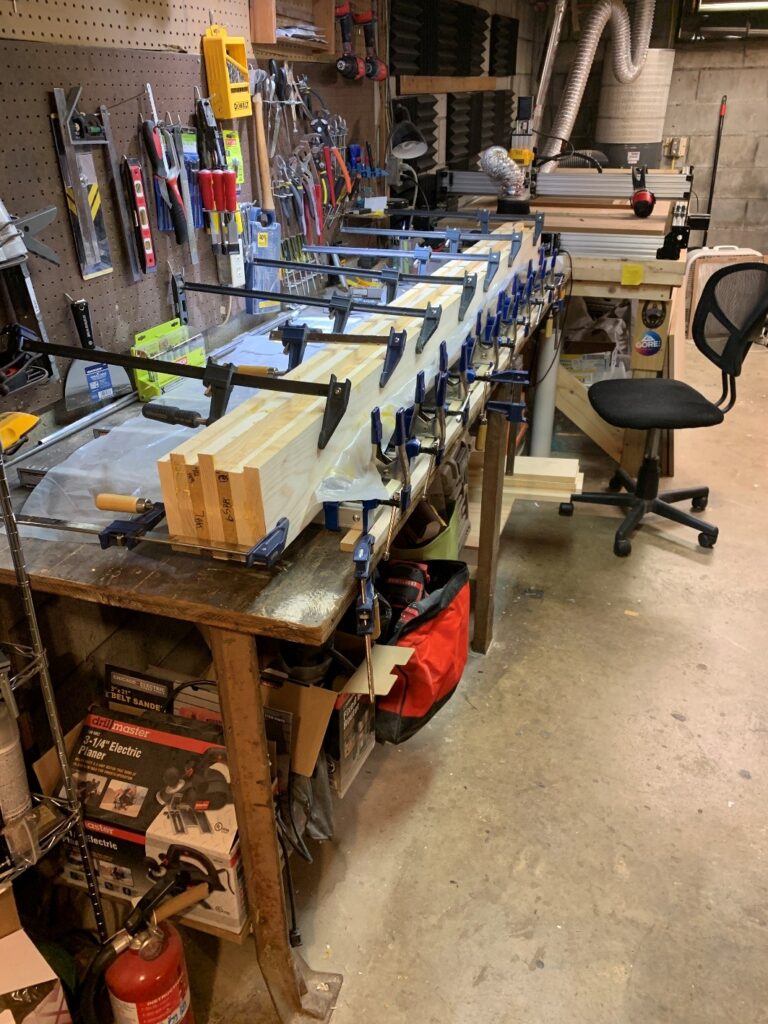
- Once all pieces are in place, tighten the clamps evenly.
- Add extra clamps along the top and ends to ensure even pressure.
Let the glued lamination dry overnight.
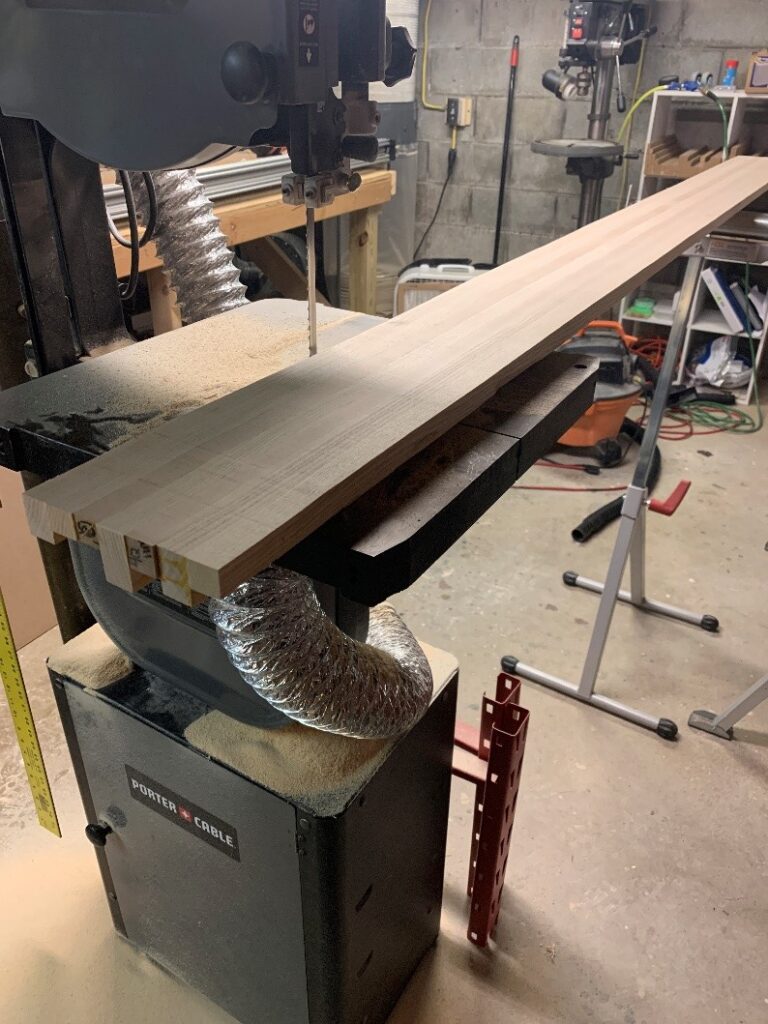
Step 3: Slice into Core Strips
- Once the “log” has dried, use a bandsaw with a resaw blade (I recommend at least 1/2″) to cut the laminated block into 20mm-wide strips. (the strips can be thinner, but affords you less leeway when planeing flat)
- If your ski or snowboard model requires a wider core:
- Rip additional strips from a 1×6 using the table saw (20mm tall).
- Laminate these onto the side of the core using the clamp jig.
Step 4: Plane to Thickness
- Feed each laminated strip through a thickness planer.
- Plane down gradually until the core blanks are reduced to 15mm thickness.
- Continue planeing as needed to smooth and flatten both surfaces.
At this stage, you’ll have clean, flat core blanks!