
How to Build Your Own Skis or Snowboard: A Guide
Building your own skis or snowboard is an extremely rewarding project! It’s a challenge that takes patience, creativity, and some applied science. There’s no feeling quite like riding gear you made with your own two hands! This guide outlines the major steps and explains the tools, equipment and processes I use at Thunderbird Snowsports to design and build high-performance, handmade ski and snowboards.
There’s a few steps involved:
- Build the shop equipment
- Design the ski
- Prepare the materials
- Layup
- Detailing, Tuning, Finishing and Testing the skis
1. Building the Equipment
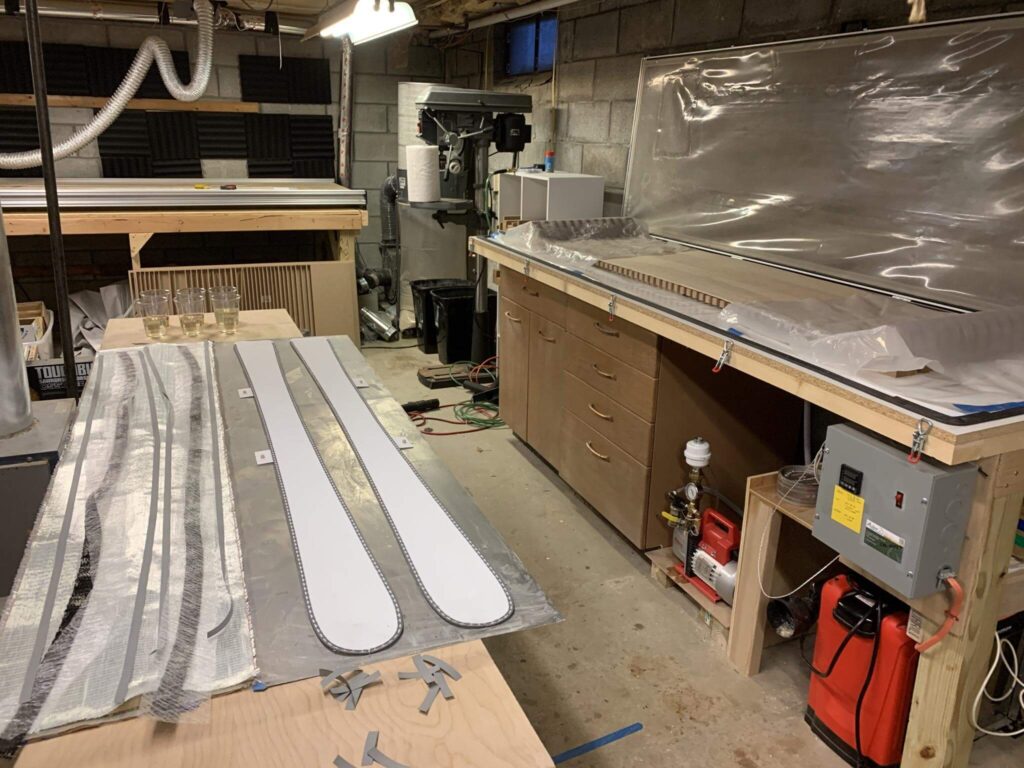
Ski Press – a ski is constructed of layers pressed together, typically consisting of the topsheet, core, composites, metal edges and base. Composites such as fiberglass, carbon fiber or flax give the ski it’s strength. The ski press forms all of the layers of the ski together under immense pressure against a mold, resulting in a single composite ski. Here’s a picture of my ski press which uses a vacuum pump to pull the layers together against a mold, while being heated from the top via an electric pad:

Edge Bender – The edges of the skis need to be pre-bent to match the shape of the base, and then they are temporarily glued to the base with superglue until it is time to press the ski. My edge bender is a modified pair of end-nippers that I ground such that the nippers have a curvature in them. In this picture, you can see my modified end nippers bending the edges to shape for a recent snowboard build:

Core Profiler – I use a CNC machine for this because of the accuracy, speed and ease of production. Don’t be discouraged at this step, there are much more economical ways to achieve the same result such as with a planer jig or router sled.
2. Designing Your Ride: Determine Your Shape and Flex Profile
Start by defining the geometry of your ski or snowboard. This includes the overall length, the width at the tip, waist, and tail, and the running length. These dimensions determine how your ski will turn, float, and handle different snow conditions.
Draw it up in your favorite CAD program. If you are looking for a place to start, there is wonderful software available for the hobbyist such as the free tool called snocad available on github ( https://github.com/mikemag/snoCAD-X )
Next, decide how stiff you want your ski or board to feel. The flex profile influences how the ride handles at speed, over bumps, or in powder.
Factors to consider:
- Rider weight and height
- Riding style (aggressive vs playful)
- Terrain preference (groomers, park, powder, mixed)
Most skis utilize a core that’s 2-3mm thick at the tip and tail, and between 8 and 12 mm thick underfoot, depending on how much stiffness is desired. Different core materials, thicknesses, and composites all affect the flex. This will take some trial and error.
3. Prepare the Materials
Before you can lay up and press your ski or snowboard, you’ll need to prepare each layer. This step is all about patience, precision and setup — small errors here can affect performance or aesthetics down the line.
Core Preparation
Start with your wood core. Give it the thickness taper and cut out the trenches for sidewall material. I pour a urethane sidewall, but ABS and even hardwood are common choices too. Mill in any insert holes or reinforcement zones (like titanal plates or VDS rubber strips).

Base and Metal Edge Preparation
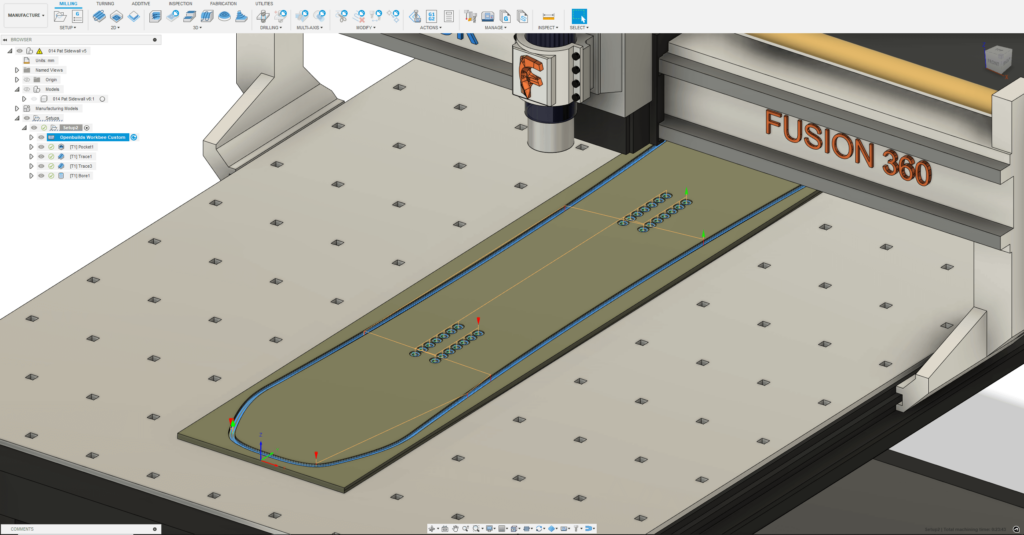
Your base material is typically sintered or extruded P-Tex. To prep it, cut the base sheet to shape using a CNC (or your template and a router). Pre-bend the metal edges to match your ski outline using your edge bender. Take your time and do this accurately as to avoid warping the base material. Superglue the edges to the base carefully ensuring tight corners and no gaps. Lightly sand and flame the base to improve epoxy adhesion. (this may not be necessary if your base material came prepped from your supplier)

Topsheet Preparation
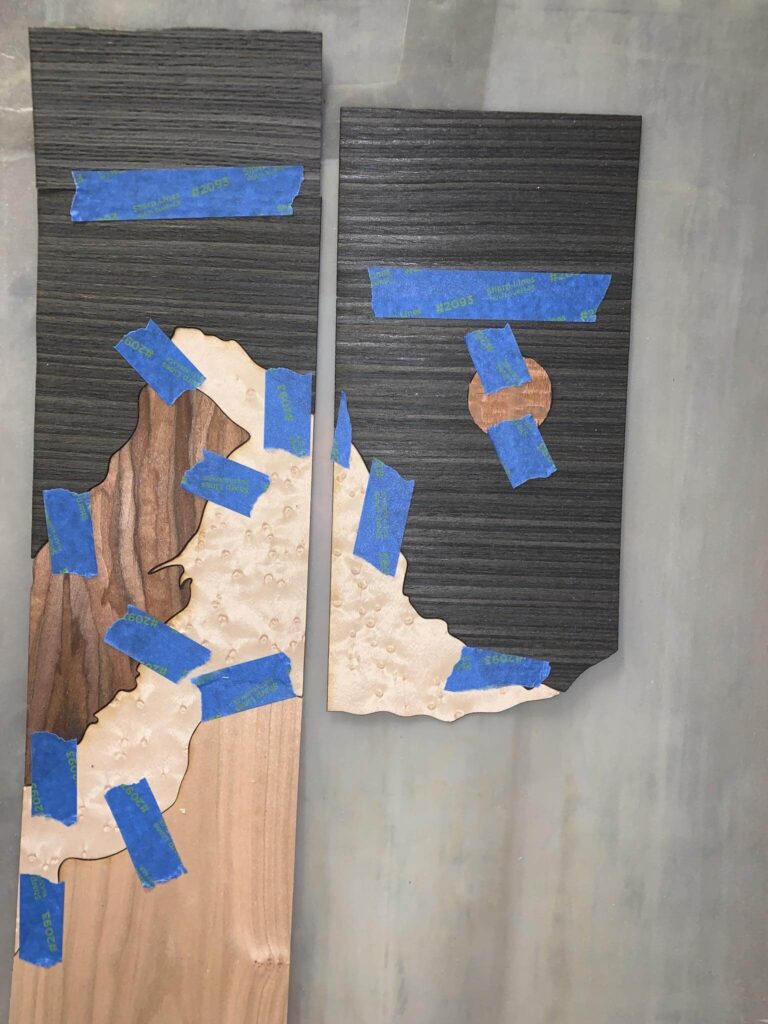
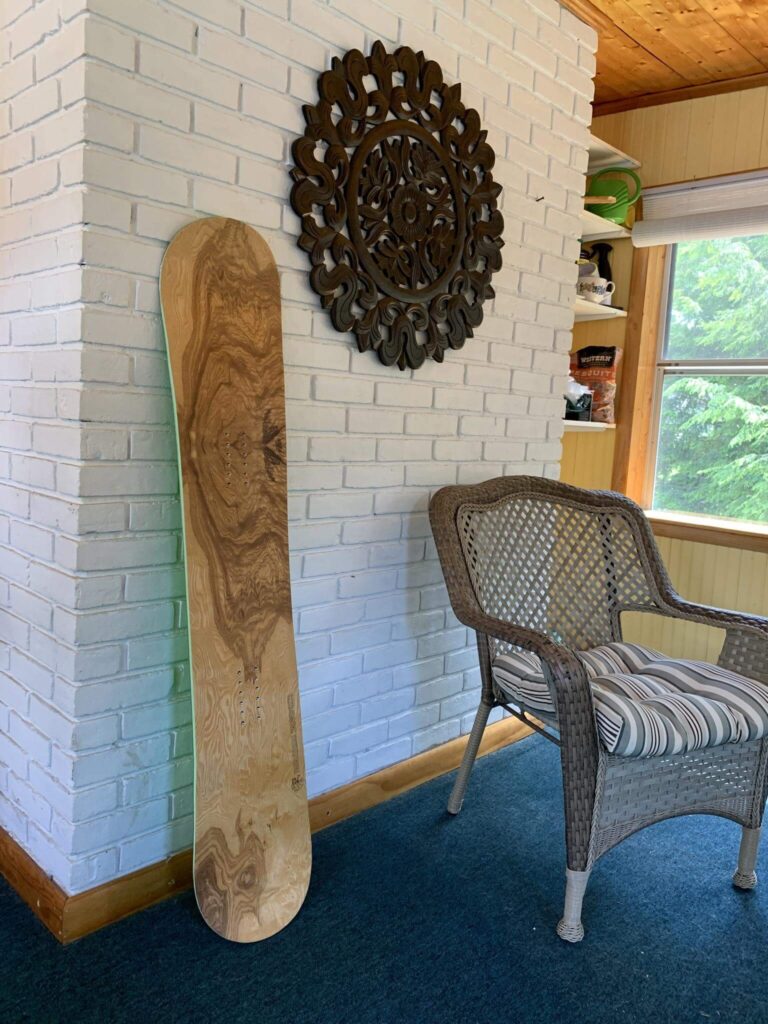
If you’re using real wood veneer (like I do), now’s the time to select, engrave, inlay or bookmatch your veneer, if desired. Flatten, sand and clean the veneer, being careful not to crack it. Join pieces together using veneering tape on the bottom and some painters tape on the top, which will hold everything together until layup. If using a graphic topsheet (sublimated, digital print, etc.), make sure the bonding surface on the bottom is clean and ready.
Composite Layers
Cut your fiberglass, carbon fiber, flax, or other composites slightly oversized to your ski dimensions. Depending on the desired torsional stiffness and weight, you’ll use triaxial fiberglass, Uni, Bi or Triaxial Carbon fiber for weight savings and snap, or titanol for dampness and torsional stiffness. Flax is also popular for damping and eco-conscious builds.
4. Lay Up (Press) the Skis/Snowboard
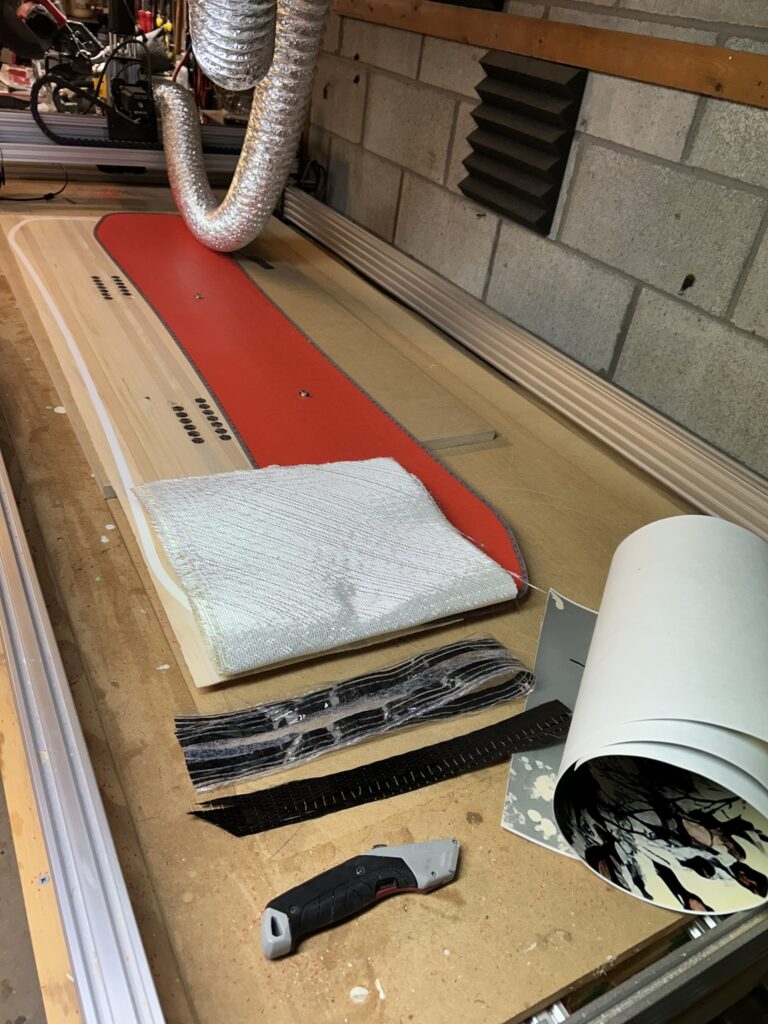
“Lay Up” refers to the process of applying epoxy between all of your layers and stacking it all up. Once this is complete, you’ll go ahead and insert your layup into the ski press and apply heat and pressure to cure it into a ski! here’s a set of snowboard components laid out and ready for layup:
5. Finish & Test It
Once the ski or board comes out of the press, it’s time for finishing: turning your slab into a ridable pair of skis.
- Trim to shape using a bandsaw or jigsaw and a belt sander.
- Clean up and bevel edges to your desired angle (e.g., 1° base, 2° side).
- Sand and seal the topsheet (for veneer) – epoxy, spar urethane, or polyurethane all work well depending on the look you want.
- Flatten and stone-grind the base for good glide (your local ski shop can help here, since ski grinding machines are expensive.)
- Mount bindings or have your local ski shop mount them.
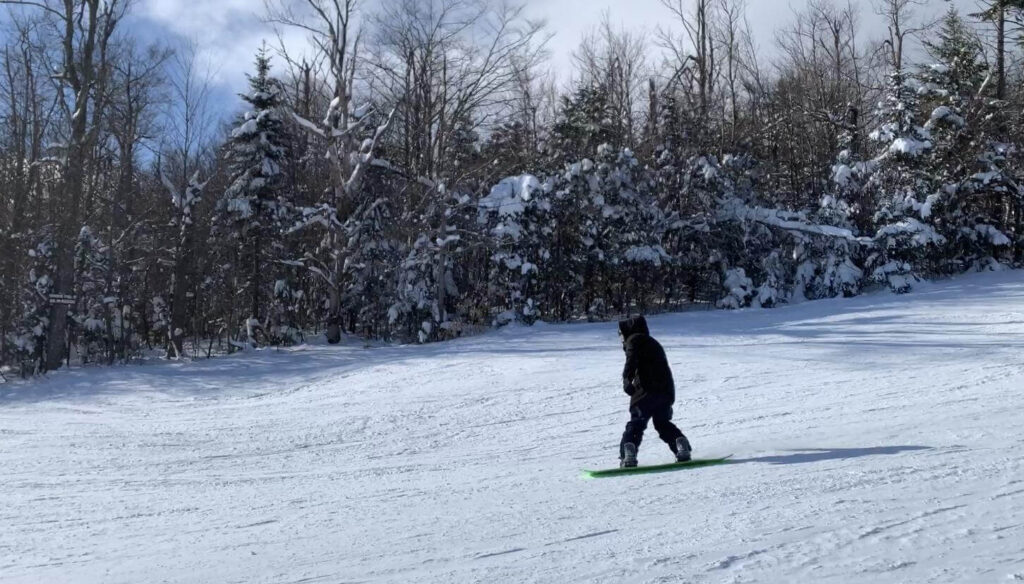
Your first ride is the real test of your build. Pay attention to how the ski or board feels underfoot and compare it to what you designed:
- Flex & Stiffness: Does the ski feel too soft or too stiff for your intended use?
- Camber/Rocker Profile: Did the cured shape match your mold, or did heating, materials, or layup thickness change the outcome?
- Edge Hold & Damping: Does it feel damp or lively? Consider different fiberglass weights, carbon strips, or core wood species.
- Weight & Balance: Is the ski heavier than expected? Did your material choices strike the right balance?
- Durability: After a few days on snow, check sidewalls, edges, and topsheet for wear.
Every build is a prototype in some way. Take notes on what worked, what didn’t, and what you’d change, whether it’s a tweak in the core thickness taper, a different camber target, or an adjustment to your edge radius. Ski building is a cycle of build → ride → refine. Each round gets you closer to the performance and feel you’re aiming for.
Final Notes
The first pair will take time, and it might not be perfect — but that’s the fun of it. Learn, iterate, and don’t hesitate to test ideas. Once you ride something you made with your own hands, you won’t go back.