
How to Build a Camber Mold
Putting in the work to make good camber mold upfront will set you up for many builds without the repetitive task of making a new mold for every shape you’d like to try. This guide shows you how to build an adjustable camber mold – a flexible base mold made from MDF ribs that slot into an MDF rack which lets you experiment with different camber and rocker profiles for your custom skis or snowboards.
If you’re a builder who just wants a fixed mold, don’t worry, grab a stack of 2×4’s, a jigsaw, a flush cut router bit and carry on!
What You’ll Need
Materials:
- 3/4” MDF sheets (medium-density fiberboard)
- Threaded rod (diameter to match your mold design — 5/16” or 3/8” works well)
- Washers & nuts to match the rod
- 5.5mm plywood (underlayment)
Tools:
- Drill & bits (sized for threaded rod)
- Jigsaw, bandsaw, or CNC router (for cutting the rib profiles)
- Clamps
- Wrenches for tightening nuts
- Sandpaper or block plane for cleanup
Step 1: Cut Your Base Rack Profiles
Using plans (like the detailed drawing below), mark out each base rack profile for the bottom rack on your MDF sheet. This rack creates the support structure of your ski’s camber and rocker ribs and allows the tip and tail curvature molds to be interchanged. The tip and tail molds are separate pieces that attach to the rack with threaded rod through the holes at each end of the rack. (all dimensions are in mm)
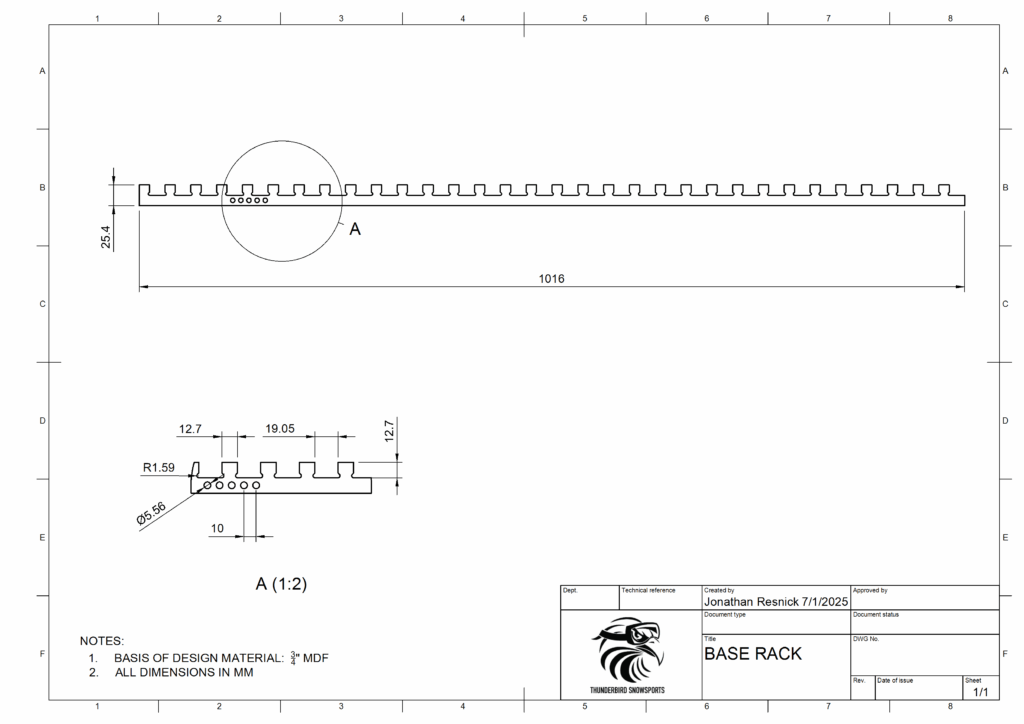
Tip: A CNC router is perfect for this. If doing by hand, precision matters so I’d recommend using a jig.
Each rack needs holes for the threaded rods to pass through. The drawing shows the spacing (e.g., every 10 mm). The rack collapses on itself to give major length adjustments, while the holes spaced every 10 mm allows fine adjustment of the length to the nearest 1 cm by threading the tip and tail mold pieces into any of the holes.
- Mark the hole centers carefully to keep them aligned.
Drill clean holes slightly larger than your rod diameter so they slide easily but don’t wobble too much.
Step 2: Cut Your Tip and Tail Molds
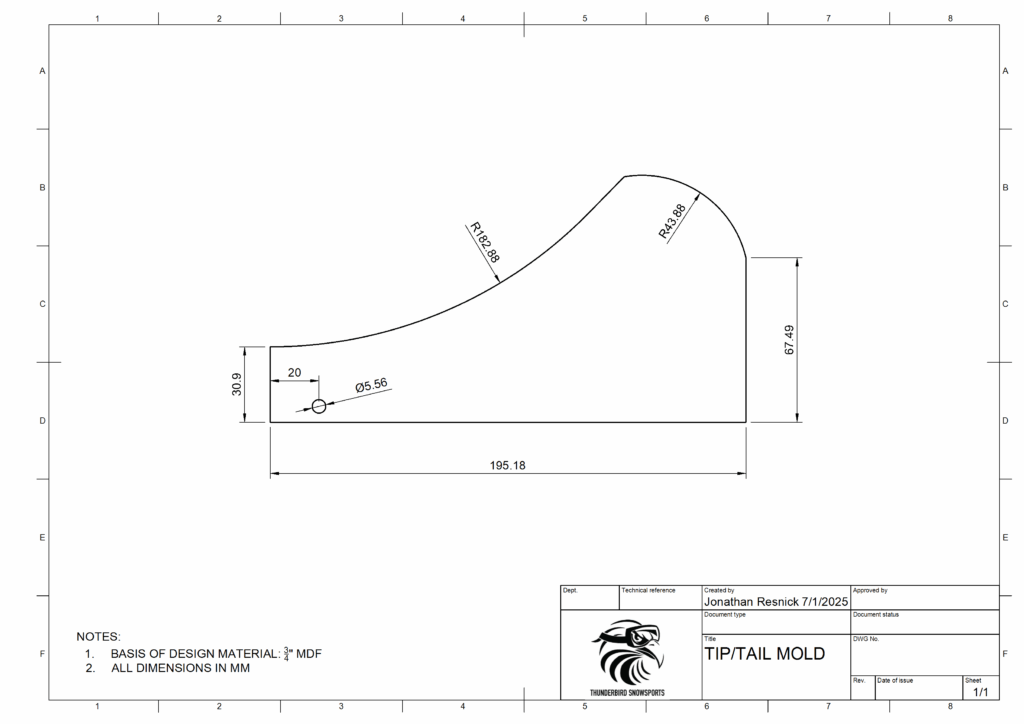
Using plans (like the detailed drawing below), mark out each tip and tail mold on your MDF sheet. The tip and tail don’t have to be the same radius, adjust the shape of each to suit your design. Since they’re interchangeable, you can make a few options such as early rise too. These, combined with the racks created earlier, form the support structure of your ski’s tip and tail curvatures and can be interchanged. The tip and tail molds attach to the rack you built in the last step with threaded rod through the holes at each end of the rack. (all dimensions are in mm)
Step 3: Cut your Camber/Rocker Ribs
The rack is designed to hold ribs of varying height that form the camber, rocker or hybrid profile of your ski or snowboard. You will typically need between 20 and 30 ribs to complete the profile, and the quantity depends on how long the running length is going to be.
When calculating how thick each rib will need to be, you need to account for a 5.5mm sheet of plywood which will sit on top of the ribs and terminate flush with the tip and tail pieces, which is why the mating edge of the tip and tail molds are at 30.9mm above the table, but the rack is 25.4mm above the same surface.
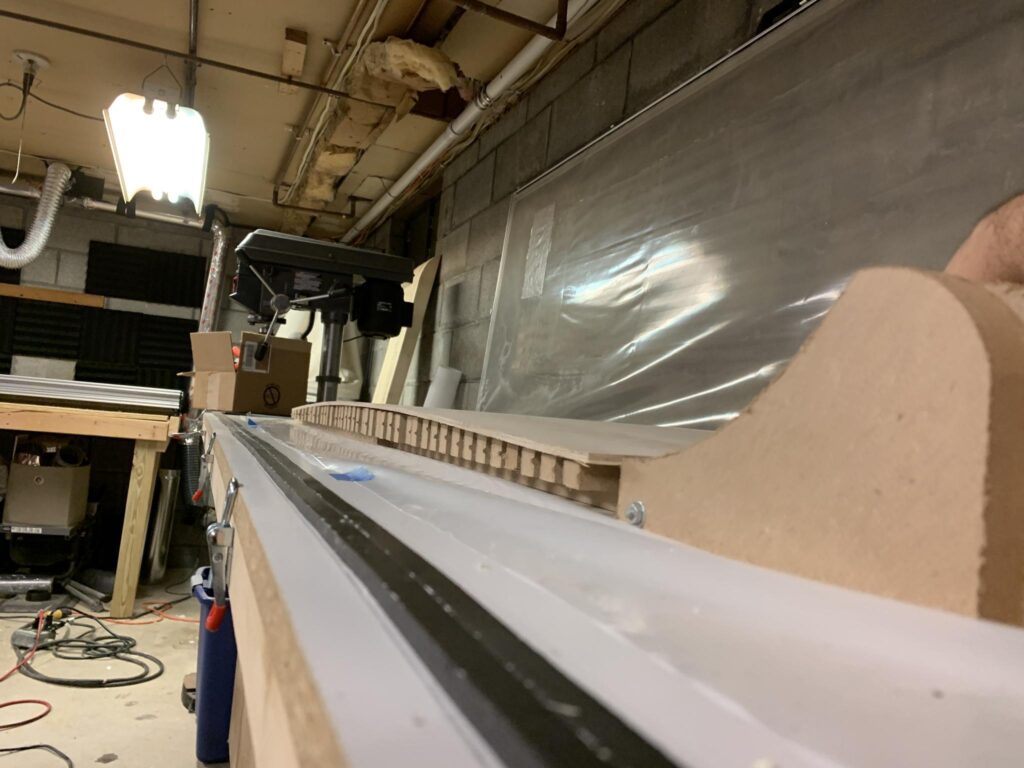
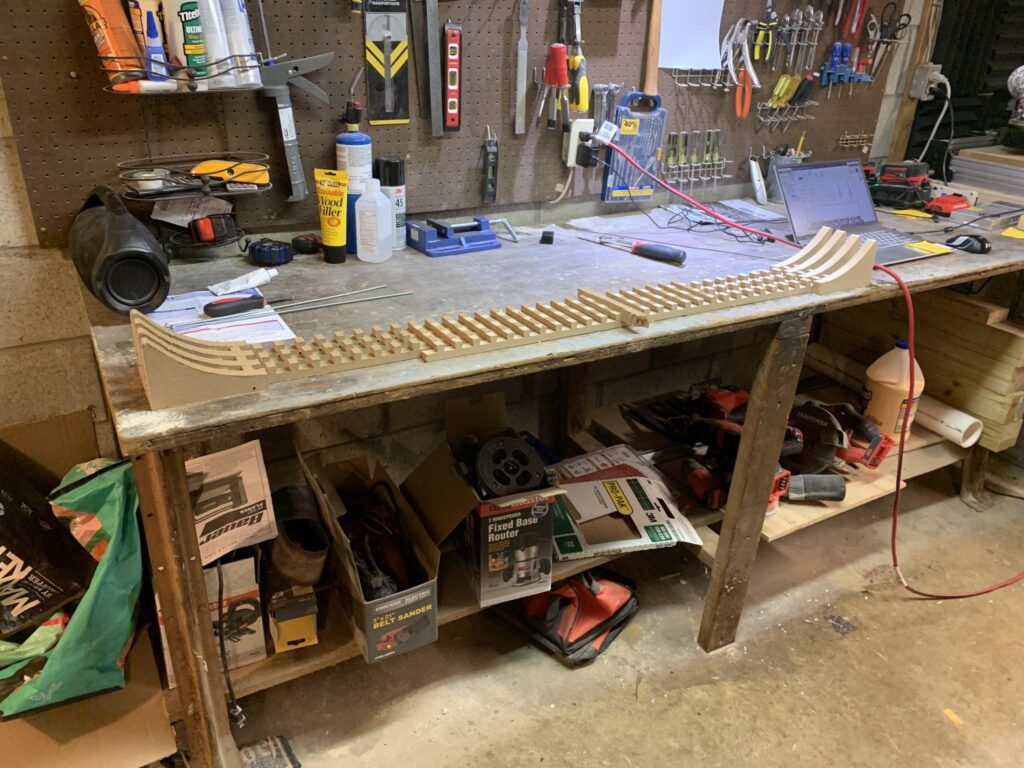
The rib under the lowest points of your build can be 12.7 mm thick, which will slot in flush with the top of the rack’s pegs, and then add height along the profile to form your curvature. Here’s a picture showing this:
Step 4: Assemble the Mold
- Slide the ribs, tip molds and tail molds onto the threaded rods one by one.
- Use washers and nuts on both sides of each threaded rod. This lets you tighten them evenly and firmly.
- Adjust rib spacing as needed to cover the length of your ski.
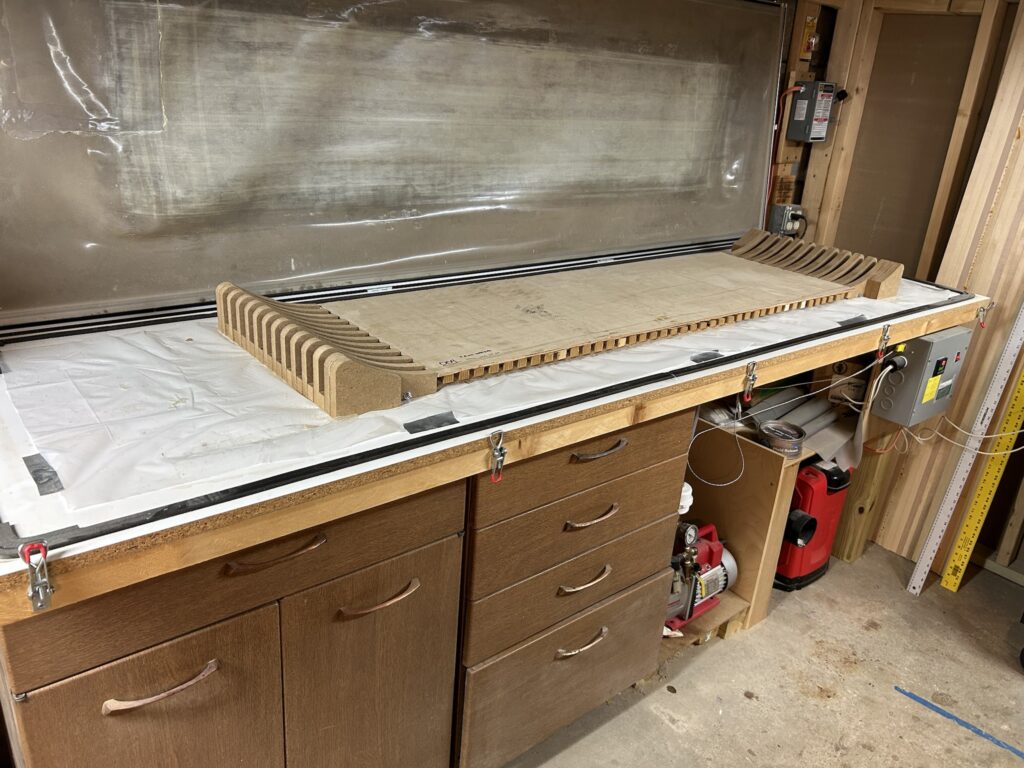
Here’s an image of how it’s going to come together where you can see how the ribs hold the two racks together, and the racks collapse on each other:
Adjustability Option:
To change the length by large intervals, you can move the racks forward or backward and each half of the mold will collapse on each other.
To make fine adjustments of 1cm, thread the tip and tail pieces into the appropriate set of holes on the rack.
To adjust the camber/rocker profile, swap the ribs out for ribs cut to different heights along the length.
This is a great way to experiment with new shapes without building a whole new mold.
Step 5: Sand & Clean Up
Lightly sand the edges of each rib, rack and mold to remove sharp corners or saw marks. This prevents the mold from snagging your layup materials or tearing your vacuum membrane.
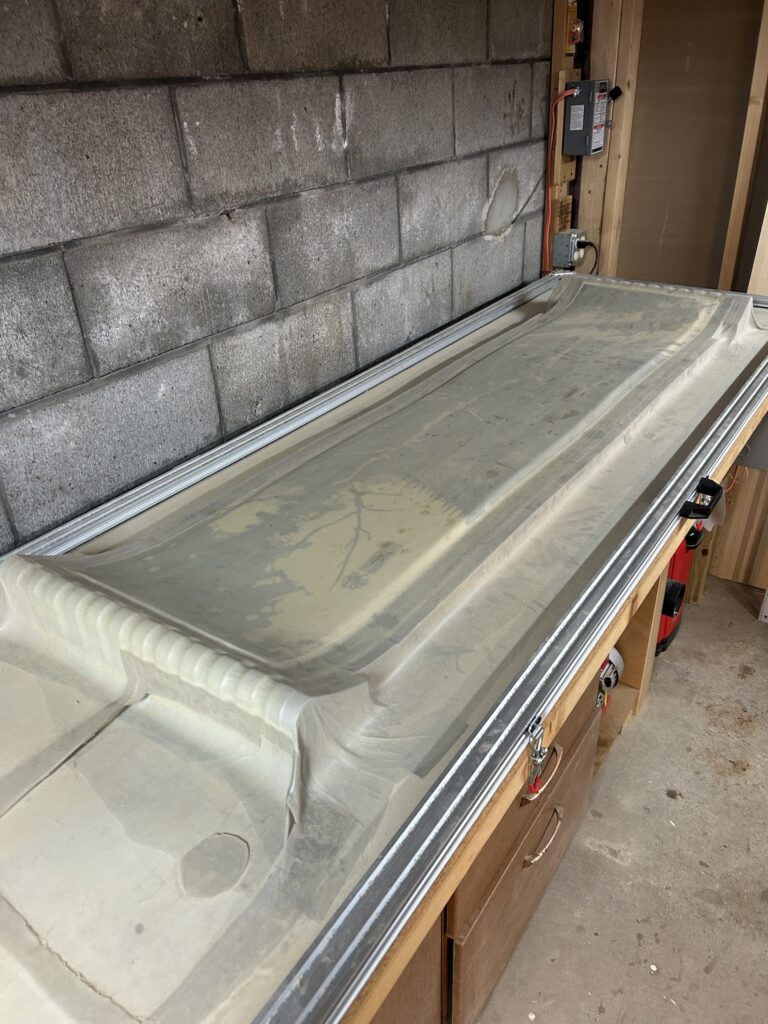
Step 6: Test It!
Place the assembled mold in your vacuum press and pull a vacuum to check that the mold holds its shape under pressure. Make any tweaks now to be sure you get clean, consistent results once you start pressing skis.
Final Tips
- MDF is easy to shape but keep it dry — cover the entire mold with painters plastic or seal the pieces so it don’t get wet – or even worse – epoxied together!
- Label your ribs by height, racks and tip/tail molds front and back so you can reassemble them in the right order.
- For a smooth surface, cover the mold with 5.5mm underlayment so that the material flexes into a smooth curvature under pressure.
With this adjustable camber mold and your vacuum press, you’re set up for any length, camber, rocker, hybrid, early rise, late rise or whatever profile!