
How to Plumb a Vacuum Pump for a Ski Press
Whether you’re building your first vacuum press or upgrading an existing setup, properly plumbing your vacuum pump is critical for achieving consistent pressure and reliable operation. This guide walks through all the components you’ll need, shows how to set up a system like the one used at Thunderbird Snowsports, and covers other options for different shop needs.
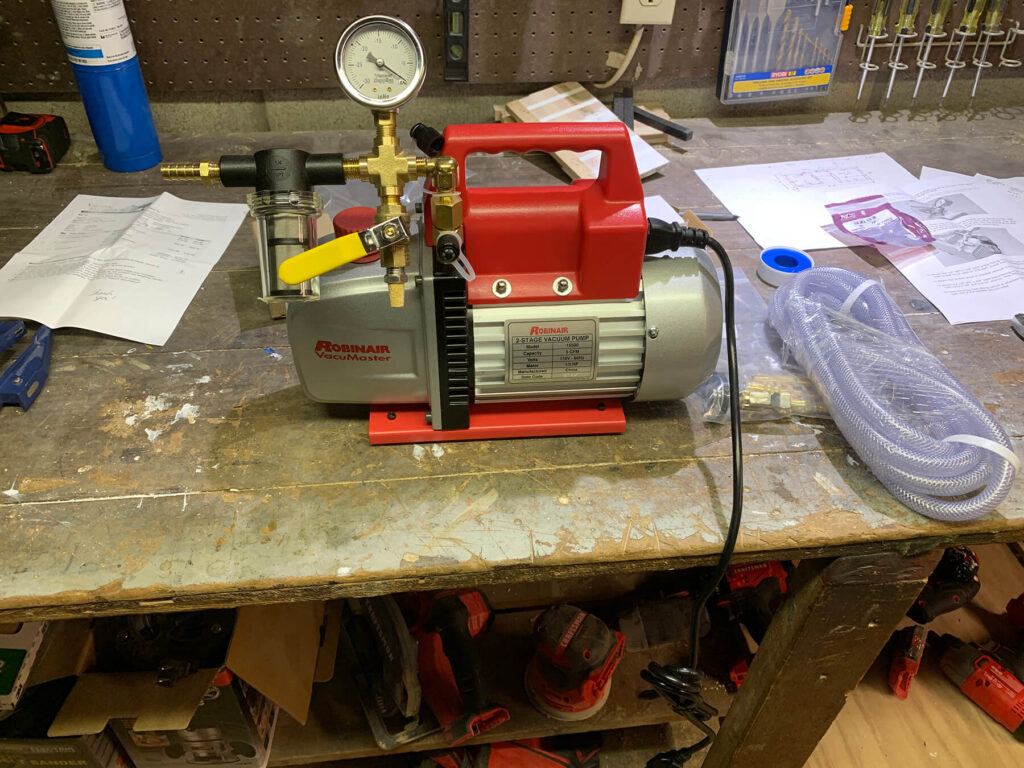
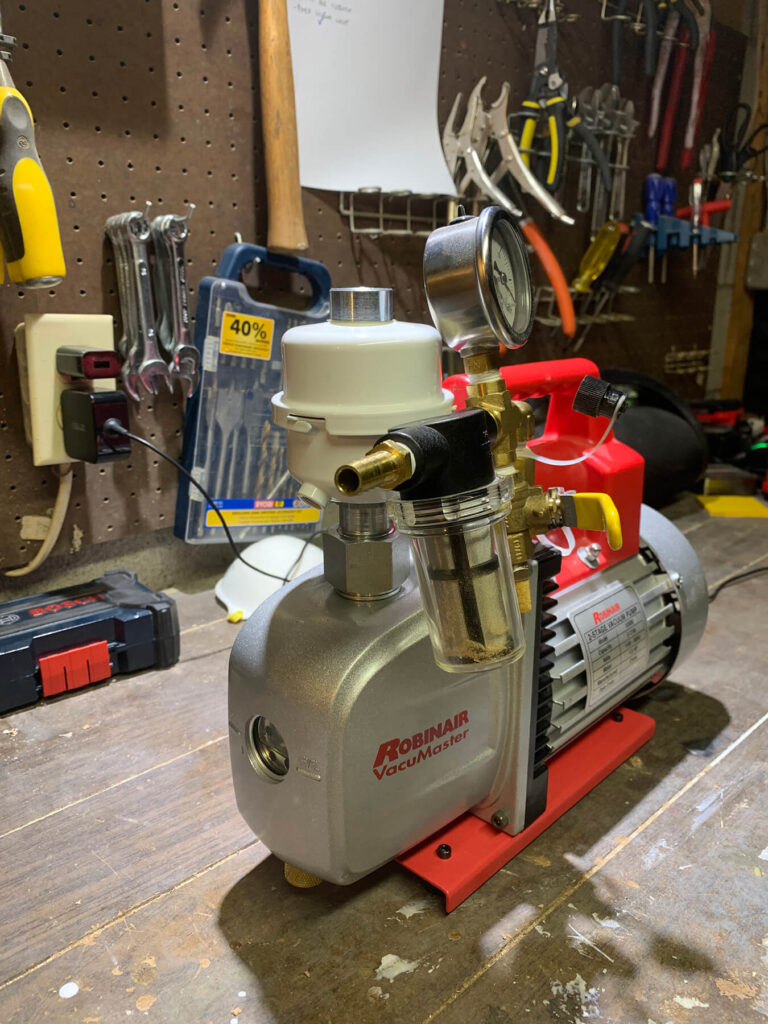
The photos above show my setup with:
- A Robinair 2-stage vacuum pump
- Inlet side: metal mesh filter, vacuum gauge, manual ball valve with strainer for breaking the vacuum and barbed connection for the reinforced PVC tubing.
- Outlet side: coalescing filter for oil vapor capture
- All plumbing is brass or PVC with reinforced hose
This setup provides deep vacuum, minimal maintenance, and a clean workspace – even after long cure cycles lasting 4-5 hours.
Essential Components
A vacuum system for ski pressing includes:
- Vacuum pump (oil-lubricated or oil-free)
- Vacuum line (preferably reinforced if PVC)
- Vacuum gauge
- Inlet filter
- Vacuum breaker valve (manual or auto)
- Exhaust filter or coalescing filter (for oil-mist control)
Here’s a breakdown of how each part works and how it fits into the overall system.
Step-by-Step: Your Vacuum Plumbing Setup
The following example is based on the setup used at Thunderbird Snowsports and shown in the photos above. It uses a Robinair 5 cfm oil-lubricated pump that pulls a strong vacuum for composite layups.
1. Vacuum Line
Start by connecting a reinforced PVC vacuum line between your vacuum bag and the inlet side of the pump. The reinforcement prevents the hose from collapsing under vacuum pressure.
Use barbed brass fittings with hose clamps for a reliable seal. Avoid soft silicone hose, which can collapse over time.
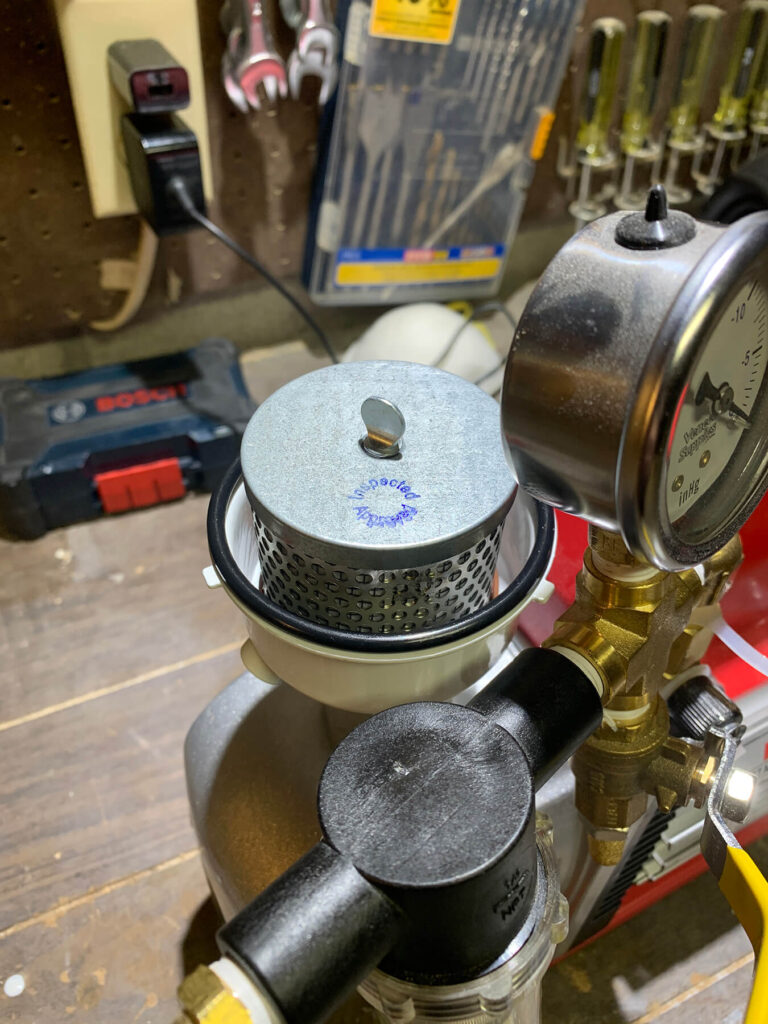
2. Inlet Filter
Install a metal or polycarbonate inline filter on the pump inlet. This protects your pump from debris, or dust that may escape from the bag or breather fabric.
- Position the filter close to the pump inlet for quick service.
- Clean or replace the filter regularly for best performance.
3. Vacuum Gauge
Thread a vacuum gauge into a tee on the inlet side to monitor vacuum levels. This is crucial for determining bag seal integrity and epoxy curing pressure.
- Mount the gauge vertically and isolate it from vibration where possible.
- Choose a gauge that reads in inHg or mbar, depending on your preference.
4. Vacuum Breaker Valve
Add a manual ball valve with a small inlet strainer as a vacuum breaker. This lets you safely release vacuum at the end of a press cycle or for testing seals.
5. Exhaust Side: Coalescing Filter
If you’re using an oil-lubricated vacuum pump (like the Robinair), install a coalescing filter on the exhaust or pipe the exhaust outdoors. These filters trap oil mist that would otherwise vent into your shop.
- Mount it vertically for proper drainage.
- You’ll reduce smell, vapor, and mess—especially important in home workshops.
Alternate Setup Options
Depending on your budget, goals, and shop space, here are some common variations:
Oil-Free Vacuum Pumps
- Clean and maintenance-free
- No oil mist = no exhaust filter required
- Quieter and smaller units available
Drawback: May not pull as deep a vacuum or last as long under continuous use and much more expensive.
Vacuum Reservoir
- Stores vacuum to reduce pump run-time
- Helpful when doing batch layups or maintaining long vacuum holds
- Can be made from PVC pipe or repurposed pressure tanks
Digital Vacuum Switches
- Used to turn pump on/off at set pressure
- Reduces heat, wear, and noise
- Especially useful for extended cure cycles