DIY Ski Build Progress: CNC, Vacuum Press Table, Poplar-Oak Core and Base
After years of following the skibuilders.com forums, I finally have a space to build my own skis! My Basement. I’m halfway through creating a vacuum press table and shaping a 165 cm full-camber slalom ski with a poplar core and oak stringers. Here’s a look at shop setup, hardware choices, and what’s coming next.
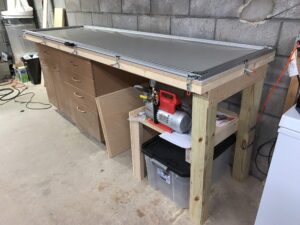
I started out in January with my buddy and feel like were getting close to pressing our first pair. He hasn’t been over in a while because of the covid circumstances, but I’ve been busy progressing the shop. I need to finish up the vacuum press table and figure out heat for it. I was thinking about getting a motorcycle tire warmer for the heat and place it on top of the silicone sheet. Next steps also include figuring out graphics and edge bending.
Here’s some photos of my progress:
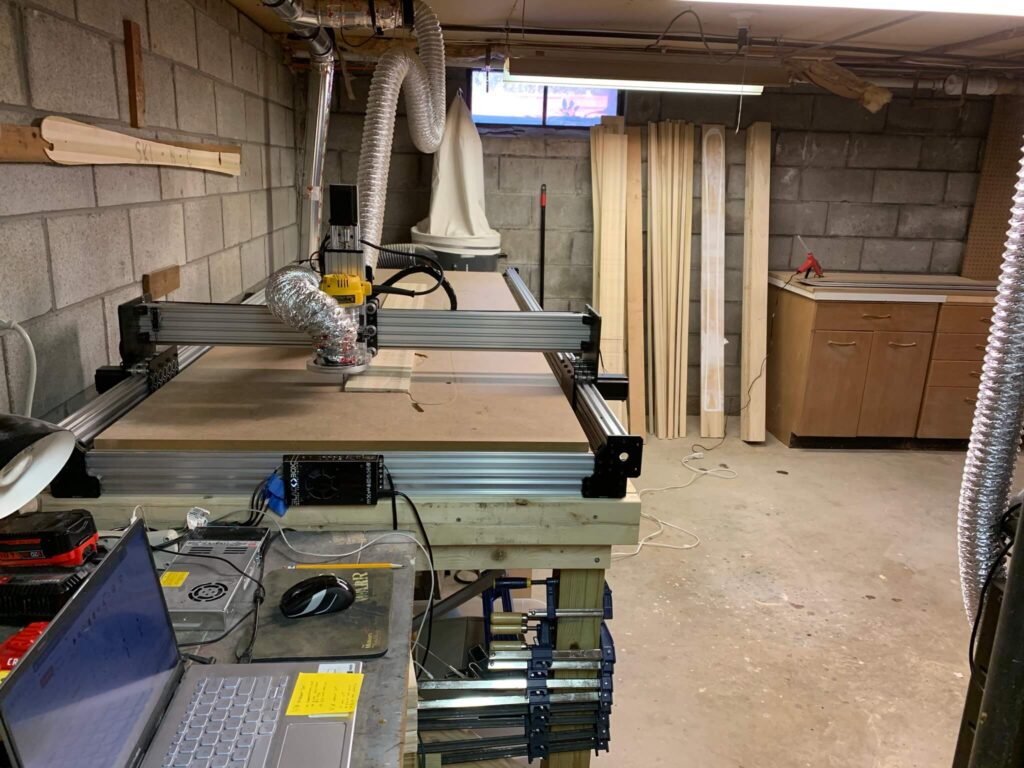
I’m using a custom-configured OpenBuilds WorkBee CNC – an aluminum-extrusion model – with a lengthened Y-axis to accommodate full ski and snowboard lengths. They supplied longer extrusions so I can mill boards up to ~200 cm long.
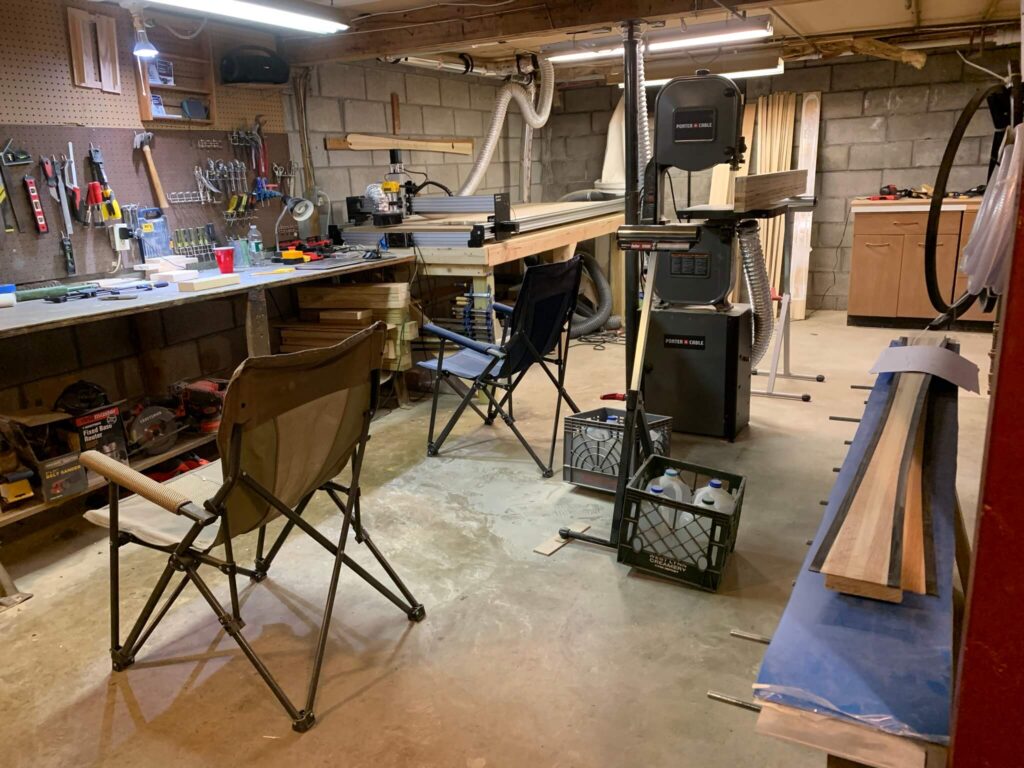
In the photo above, you’ll also see my DIY dust collection system. I used a Harbor Freight unit to manage shop dust. While the filter bag isn’t HEPA-grade, it significantly reduces airborne dust and keeps the workspace cleaner. In the background you can also spot the early stage of my vacuum ski press setup. I’ll dive deeper into its build and testing in a future post.
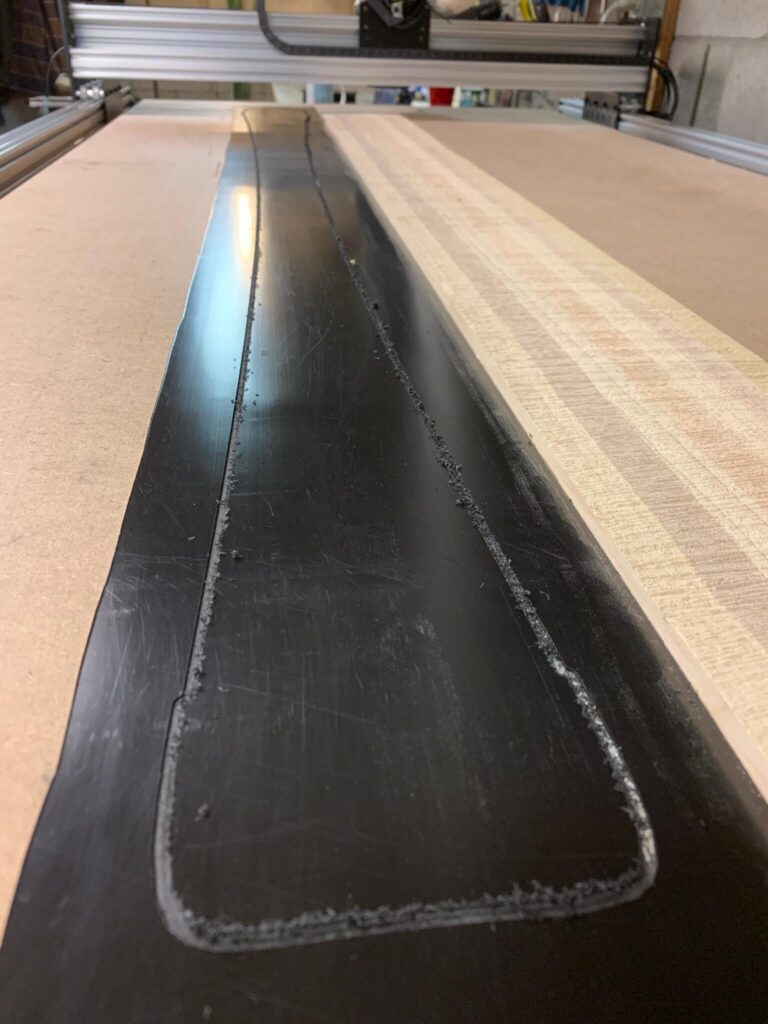
I used the CNC machine to mill the bases from sintered DuraSurf UHMW polyethylene – the same material commonly referred to as P‑Tex. This P-Tex is known for its durability, excellent glide characteristics, and wear resistance. Milling P‑Tex on the CNC allowed me to precisely shape the base, ensuring the ski will have the correct sidecut curvature along the length of it.
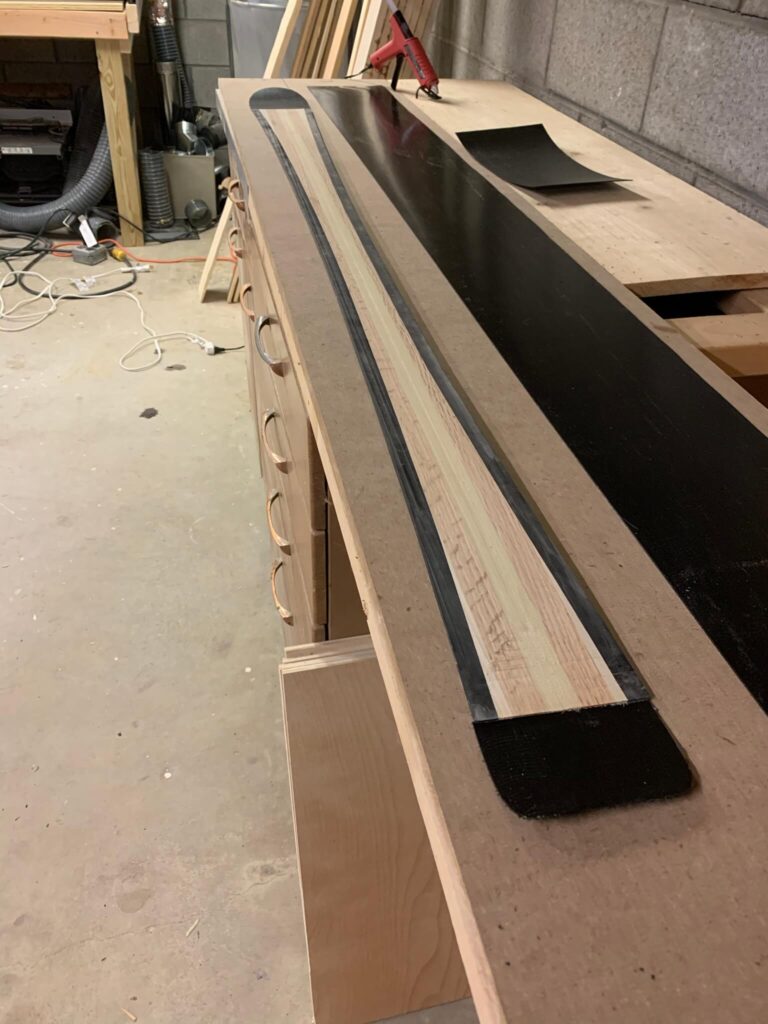
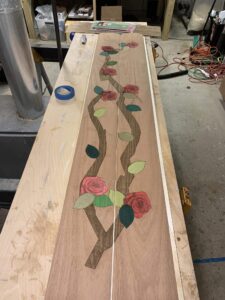
In this photo, you can see the poplar core reinforced with oak stringers, oriented lengthwise, to improve stiffness and rebound energy. Poplar is a popular choice for ski cores due to its lightweight yet resilient flex pattern and natural vibration absorption. The oak stringers add extra rigidity and drive, enhancing edge grip and power transfer without significantly increasing weight. They also serve to grip the binding screws better than the softer poplar wood, ensuring the bindings won’t tear out. I used the CNC to profile the core thickness, tapering it to 2 mm at the tip and tail, while tapering to about 12mm underfoot thickness through the midsection. ABS sidewalls were glued to the core. This ski will have a 113mm tip width, 64mm width underfoot, and 98mm width tail and be 165cm long, mimicking a pair of Fischer RC4’s that I love but are shot from many years of skiing on them.

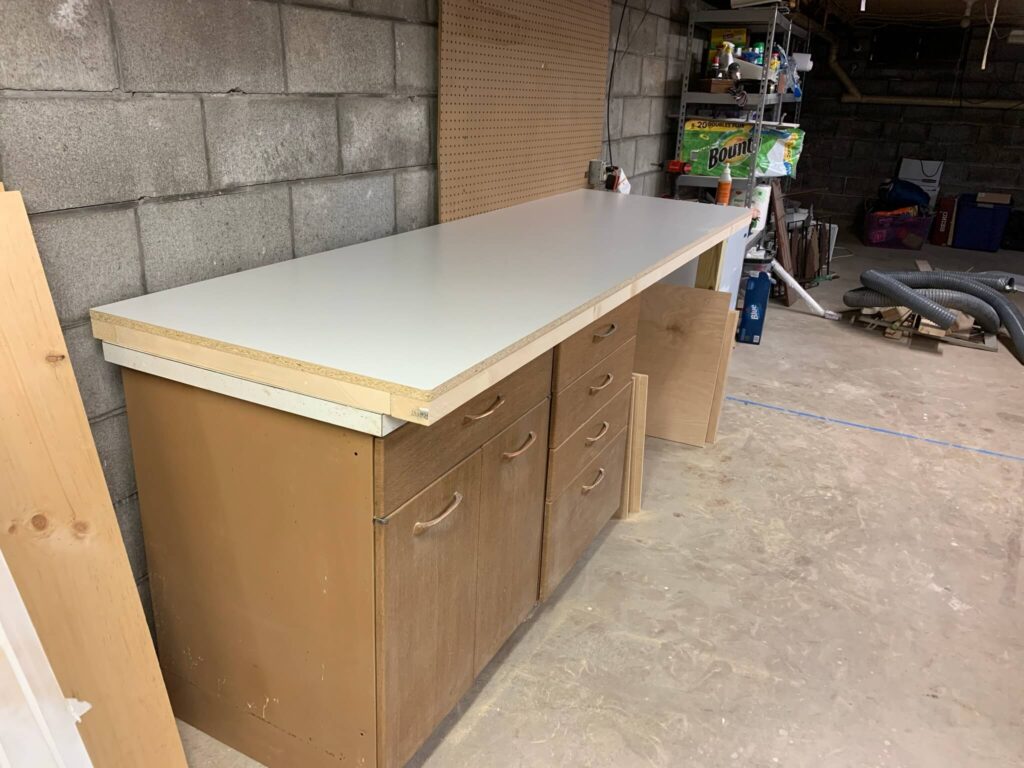
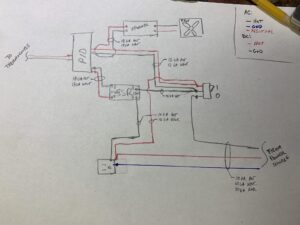
I’m hoping to get the rest of the vacuum press hardware attached and do a full vacuum test this week. One detail I’m still figuring out is the vacuum hose connection – I have an old-style vacuum connector fitting from VeneerSupplies.com that I plan to use, but I’m debating whether to install it directly in the stretchy silicone membrane or through the press table itself. Installing it in the silicone would be simpler, but I’m concerned about long-term wear or tearing when the membrane flexes under pressure. Some DIY ski builders run the vacuum connector through the rigid table surface instead, which avoids stress on the silicone but makes getting a perfect seal trickier.