Building Skis for My Wife – Tree of Life Inlay Part 2
I’m excited to share the progress on my latest ski build, a custom pair of skis I’m making for my wife. This project is a little different from my past builds because it incorporates a detailed topsheet design featuring a tree of life marquetry inlay with over 50 individual pieces. This project taught me a lot about dialing gap widths when doing inlay work.
These skis are 146 cm long with a 137 cm running length, 121/77/111 mm dimensions, and a 12 m sidecut radius. The cores are already cut, profiled, and sidewalls poured, so now I’m focusing on the topsheet, bases, and edges.
Cutting and Profiling the Core
The core was CNC-cut and profiled to taper at the tip and tail while keeping enough thickness underfoot for proper flex. The sidewalls were poured with a 70 D hardness urethane (smooth-cast 300) and light blue pigment, giving a clean contrast and a durable finish.
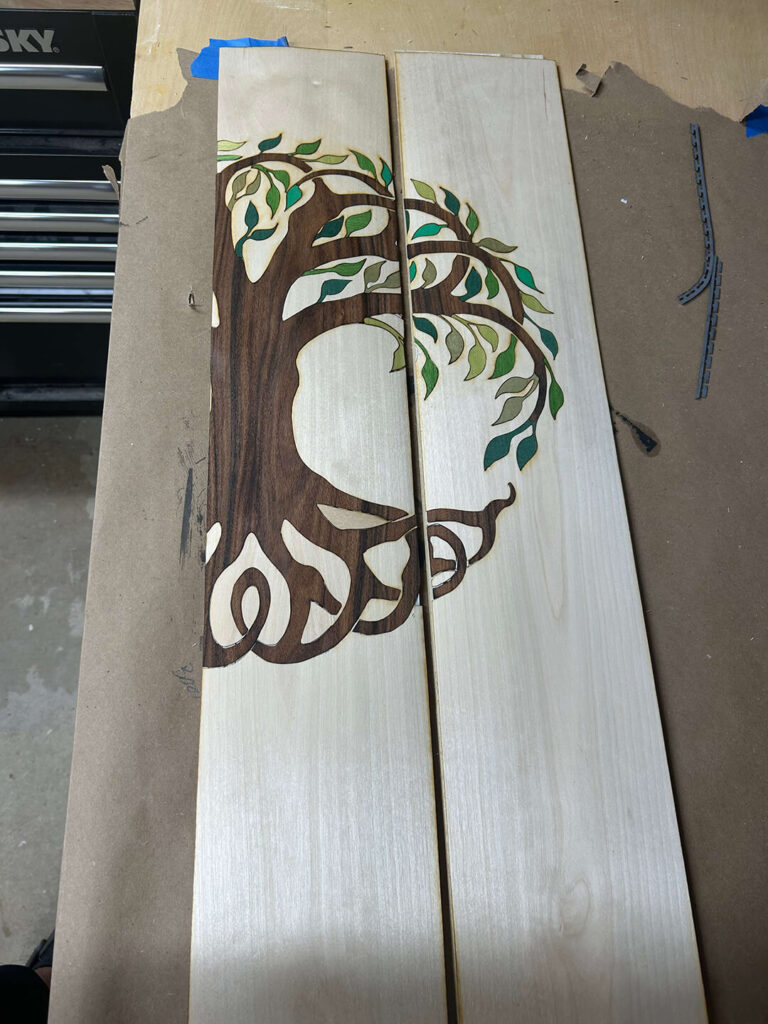
Tree of Life Veneer Inlay Topsheet
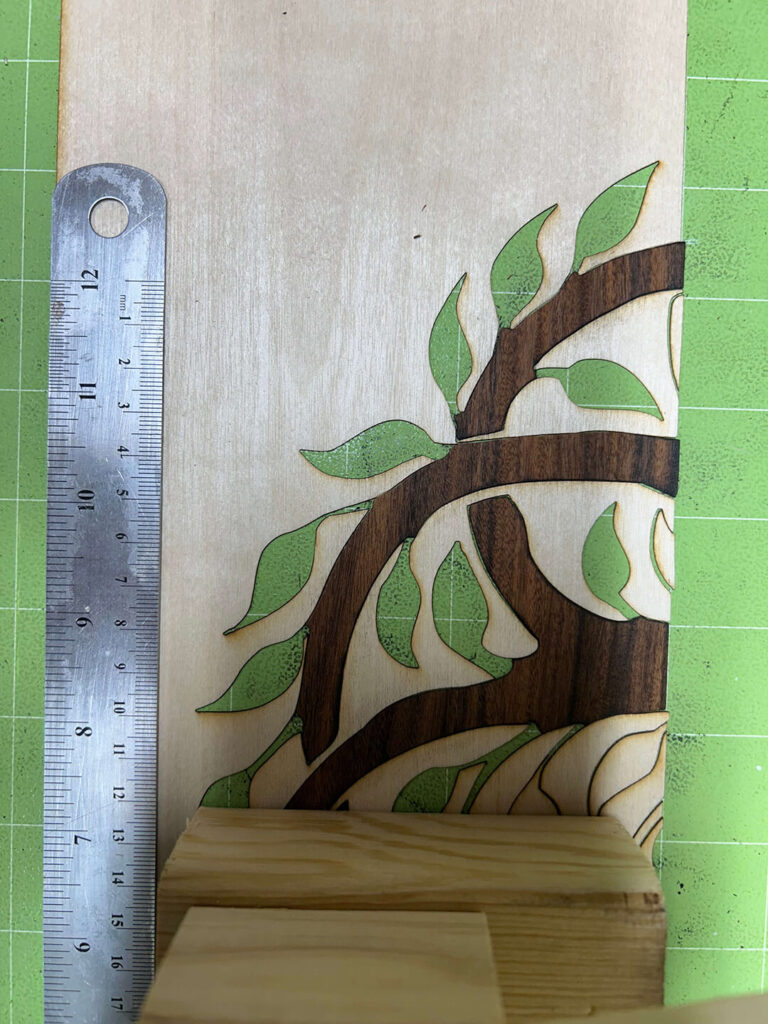
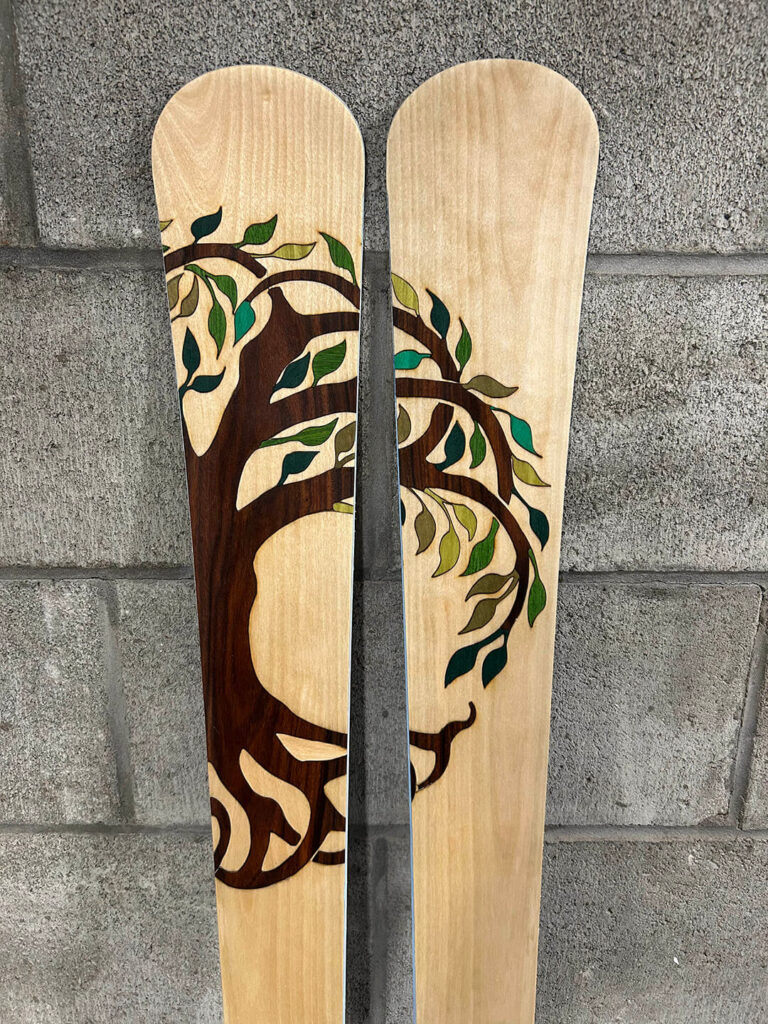
For the topsheet, she chose flat-cut birch veneer as the background with a rosewood trunk and green-dyed veneer leaves for the inlay. The design is based on a tree of life motif that I scaled and arranged in CAD to fit perfectly within the ski outline. More on that in the last blog post!
The inlay process starts with cutting the background and then working piece by piece on the smaller details. To keep everything aligned, I use a green tacky mat which holds the veneer parts in place during assembly.
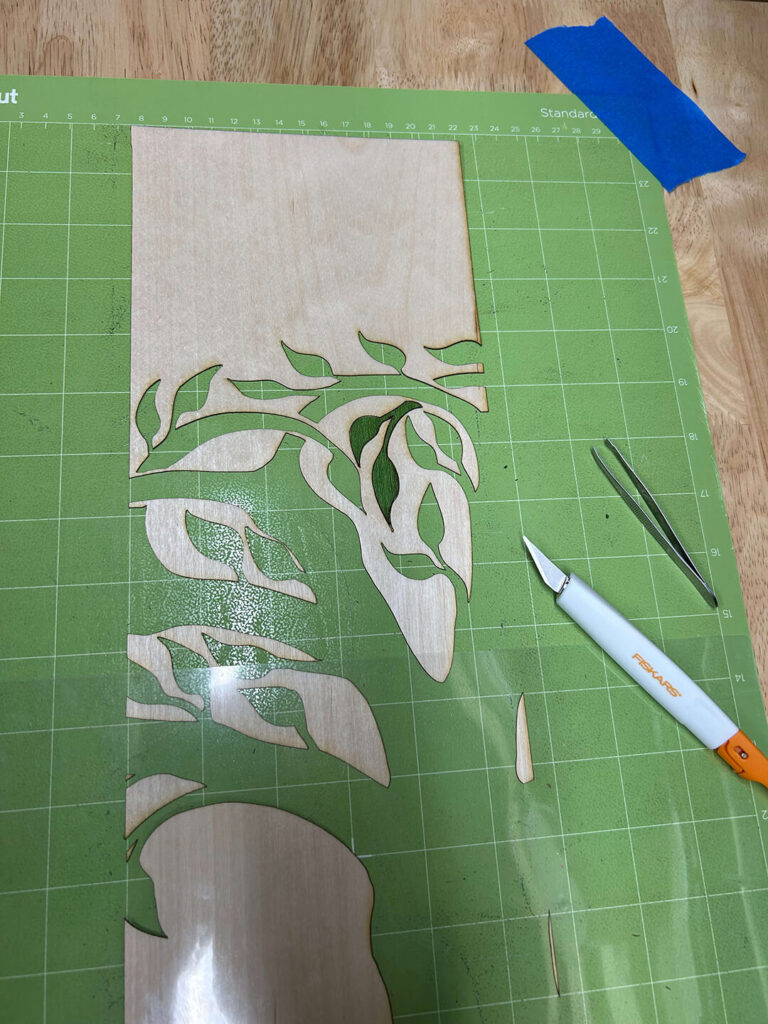
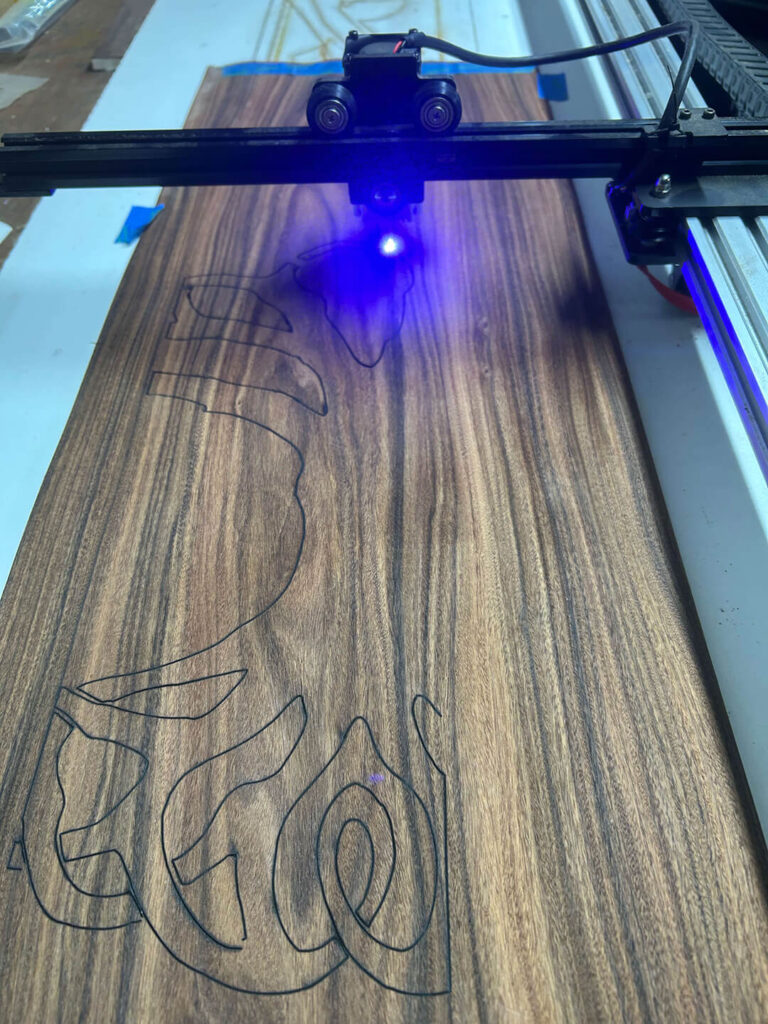
Laser Cutting the Tree Trunk
The rosewood trunk was cut using my extended laser engraver. I’ve been dialing in the accuracy because sometimes the cuts in the trunk don’t perfectly match the background slots. After ruling out mechanical issues, I realized the difference in cut speeds between veneers may be the cause.
Scaling and Refining the Fit
To improve precision, I started photographing the background with a ruler, then scaling and retracing in CAD. This lets me make small adjustments so each leaf and branch slot aligns properly. The result is much tighter seams compared to earlier veneer builds like my rose skis.
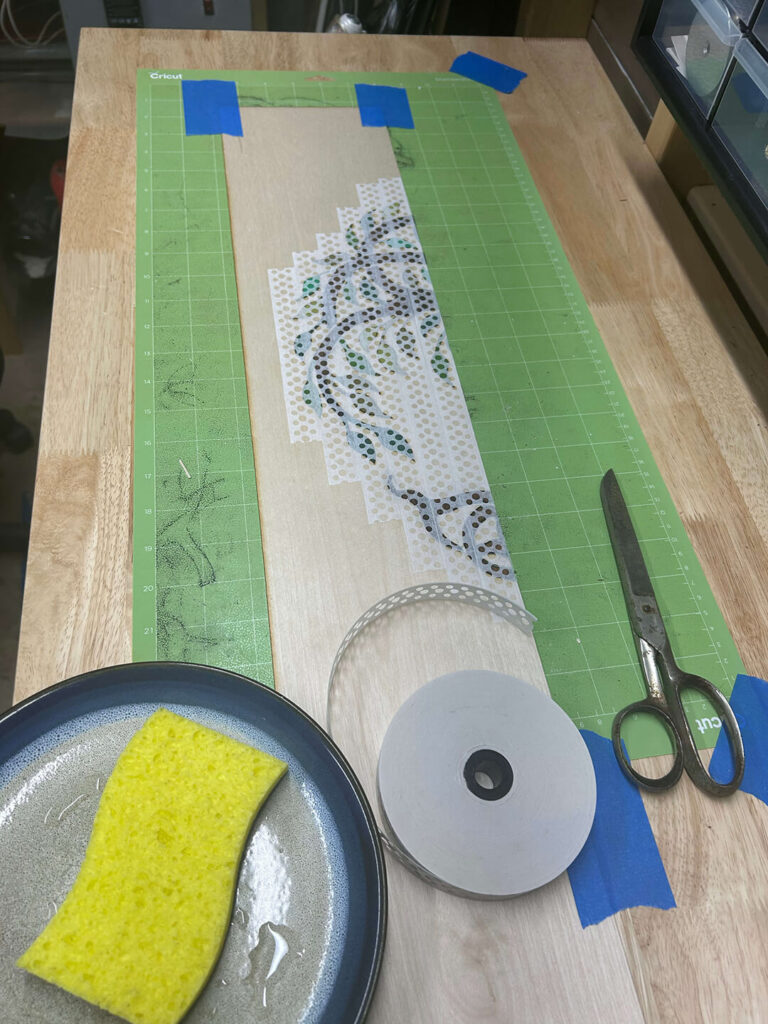
Veneer Taping and Assembly
Once the pieces are cut and fitted, I use three-hole veneer tape to join everything. I prefer this method because the holes allow epoxy to flow through during layup, making the joints stronger. The tape is activated with a damp sponge, then weighted flat while drying to keep pieces from overlapping.
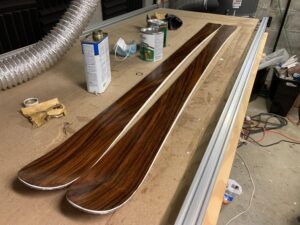
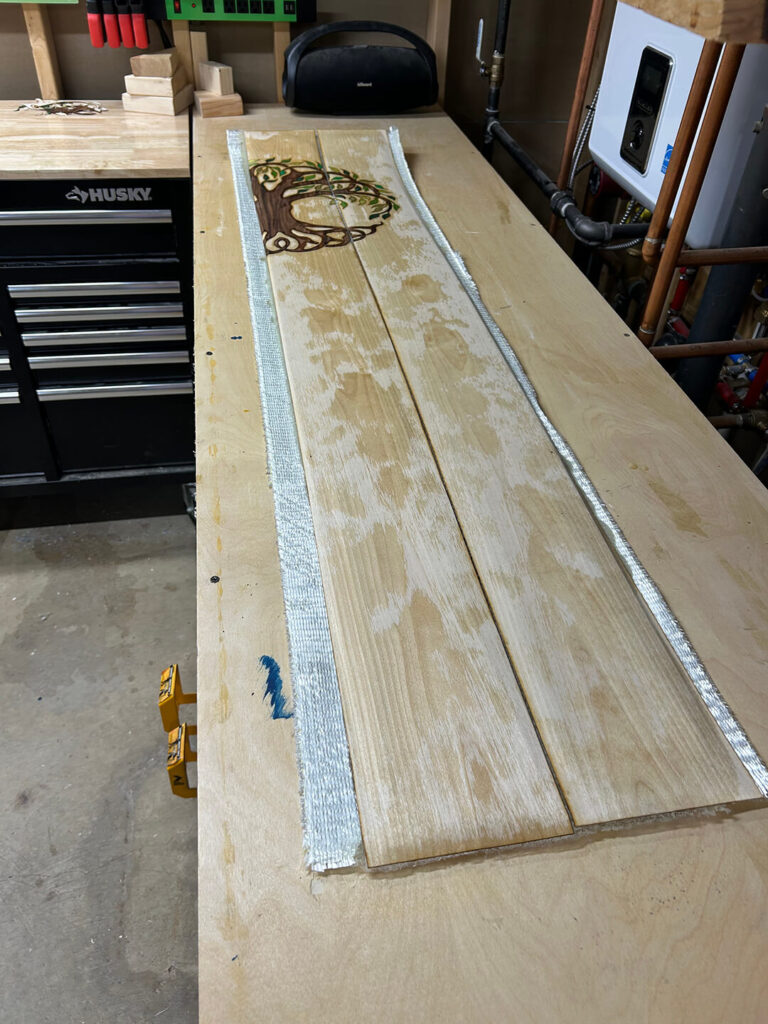
Finished Topsheet
After more than 50 pieces and about a month of work, here’s the completed tree of life inlay topsheet, ready for pressing:
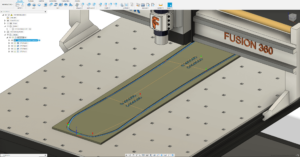
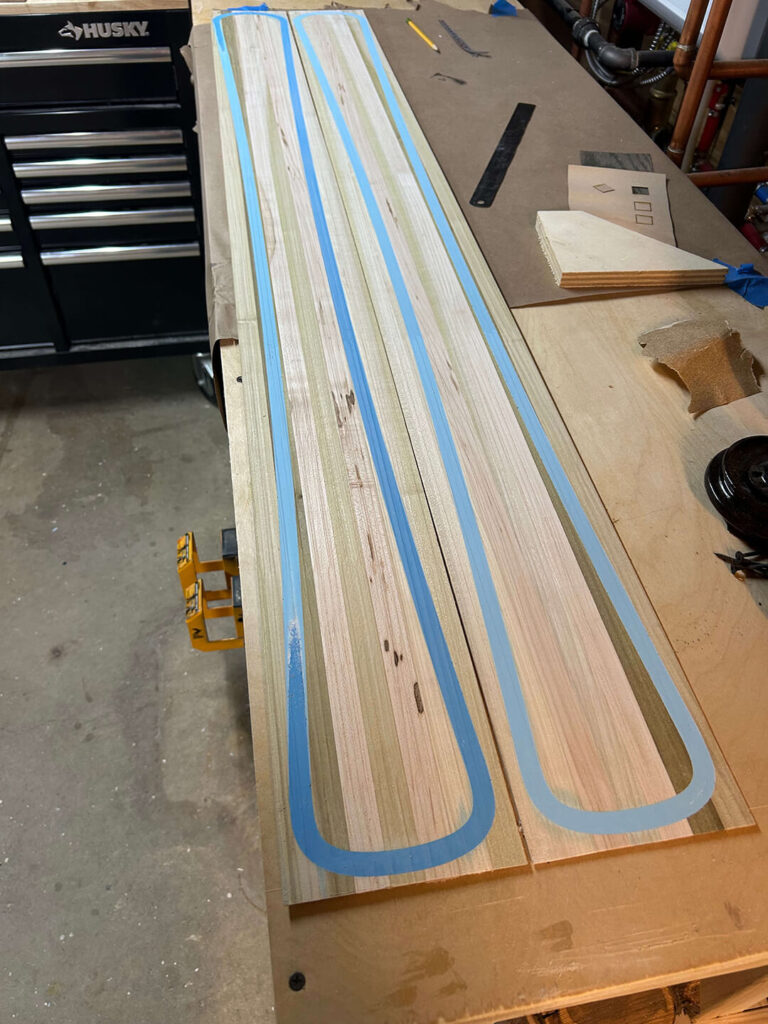
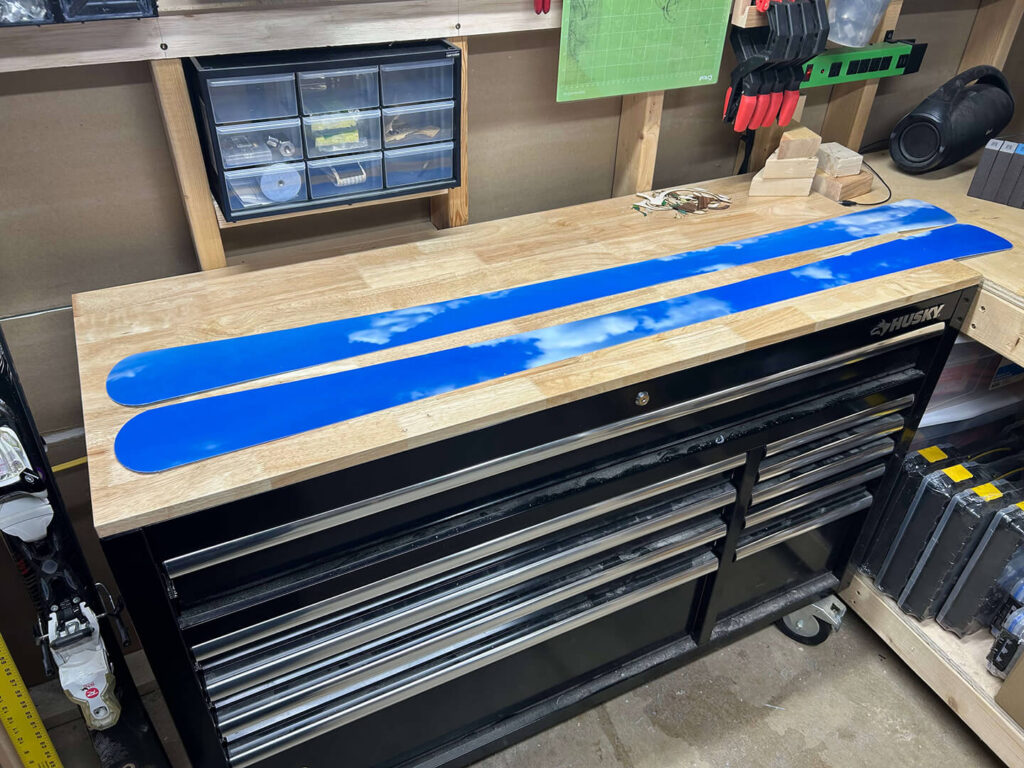
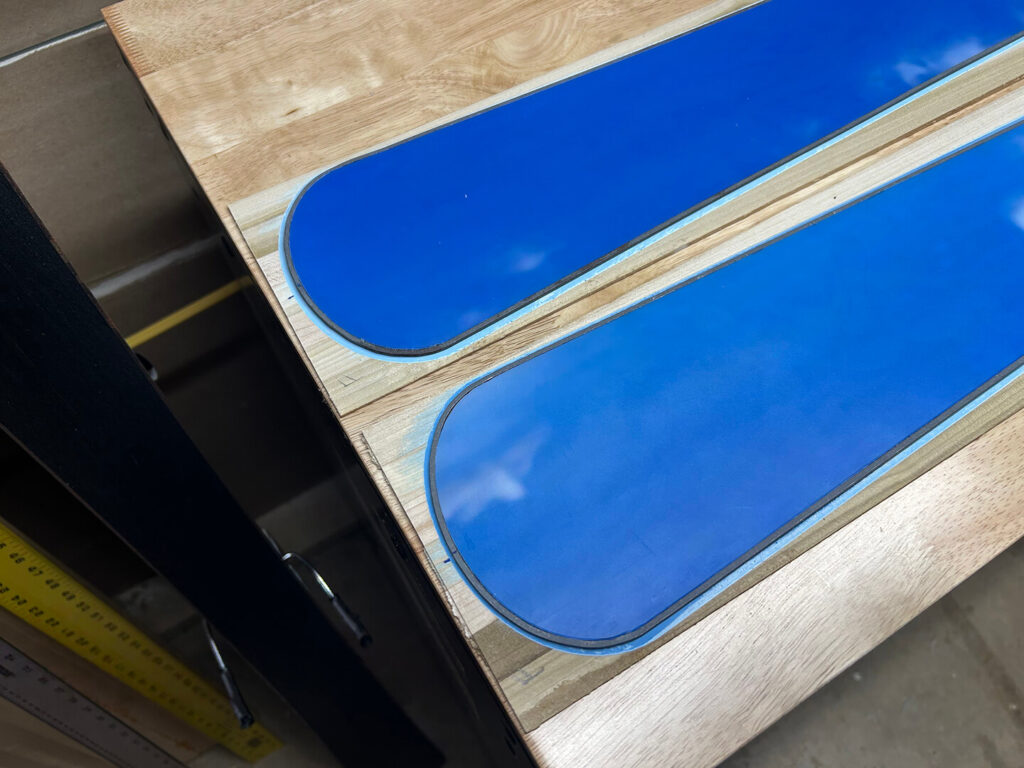
Bases and Edge Work
With the topsheet finished, I cut the base outlines on the CNC and prebent the steel edges to match. For the tip and tail wrap, I carefully notched the base material to fit the edge tangs. Once the edges were clamped in place, I tacked them with a bead of superglue every few tongs.
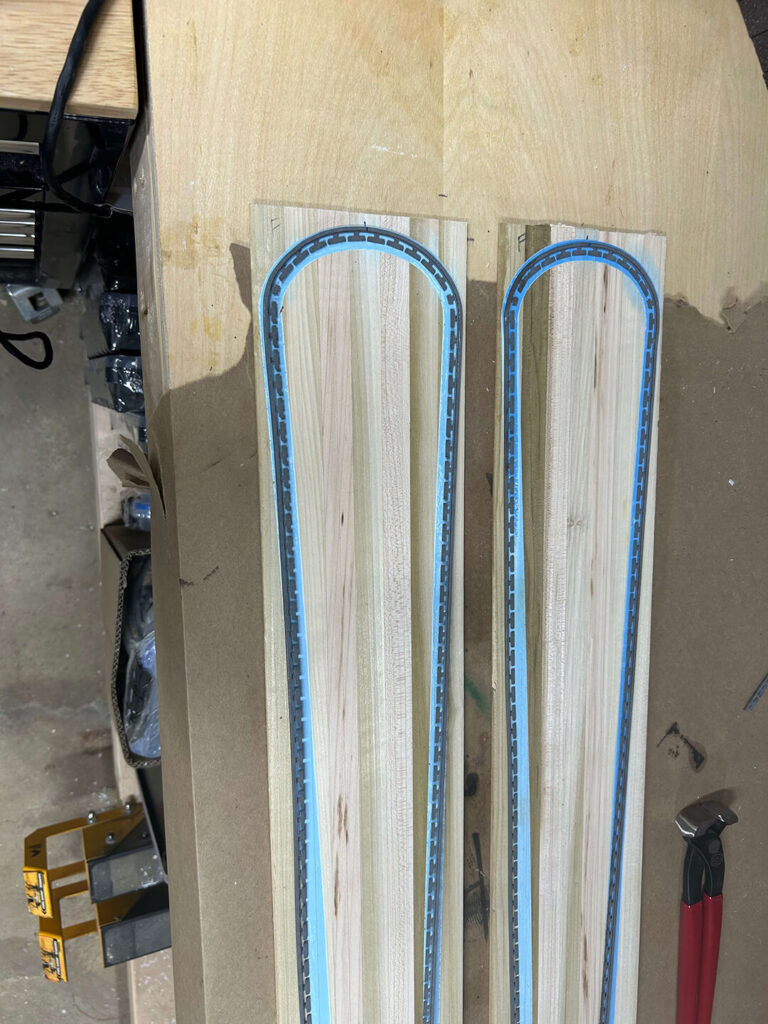
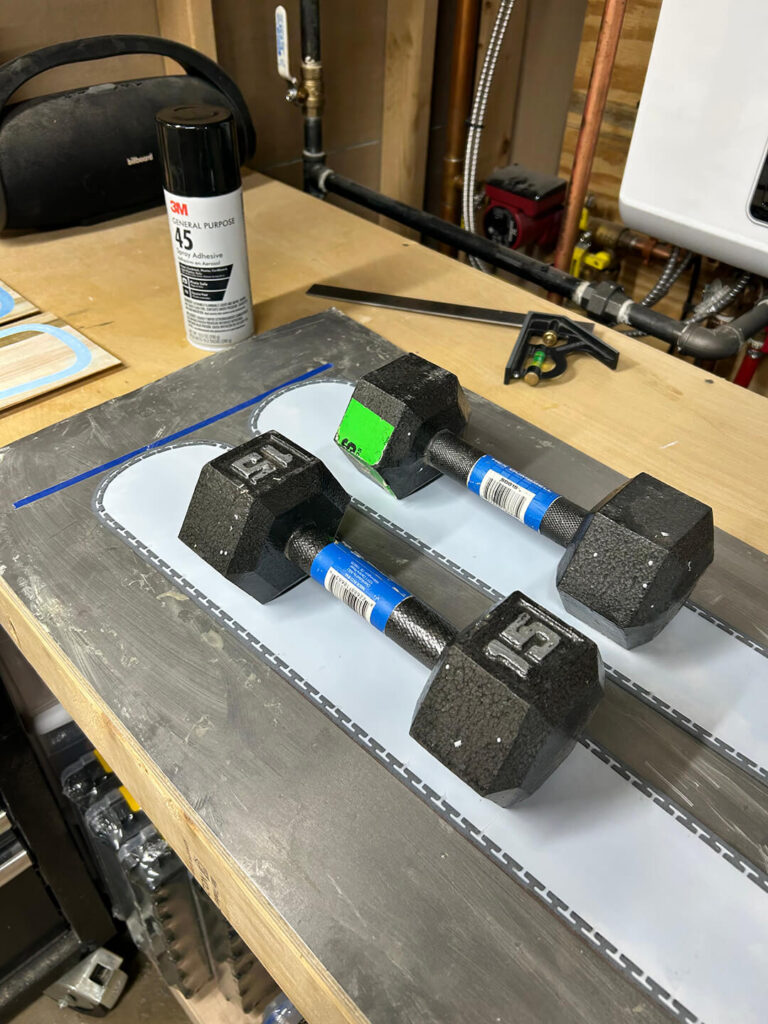
Prepping the Cassette
Before layup, I sprayed the bases with adhesive and fixed them to the cassette, ensuring alignment with the camber mold. This prevents shifting during layup and transportation to the press.
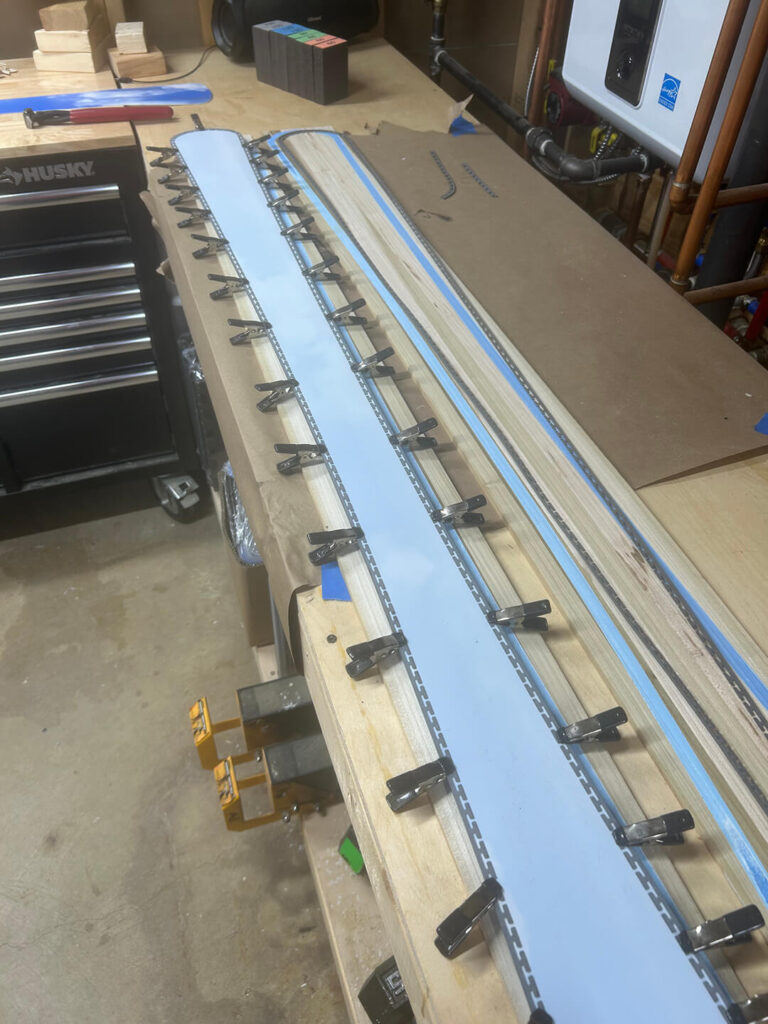
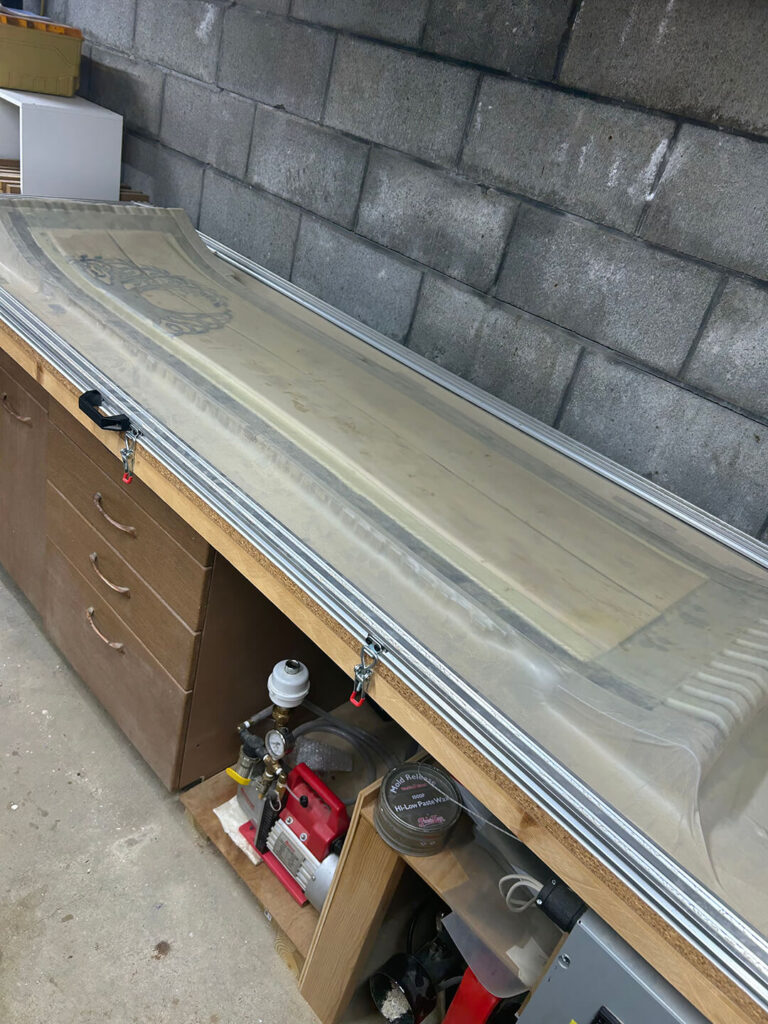
Pressing the Skis
The full layup was done with fiberglass, carbon reinforcement, VDS rubber, and the inlayed veneer topsheet. Everything went into my vacuum press with heat blankets for curing.
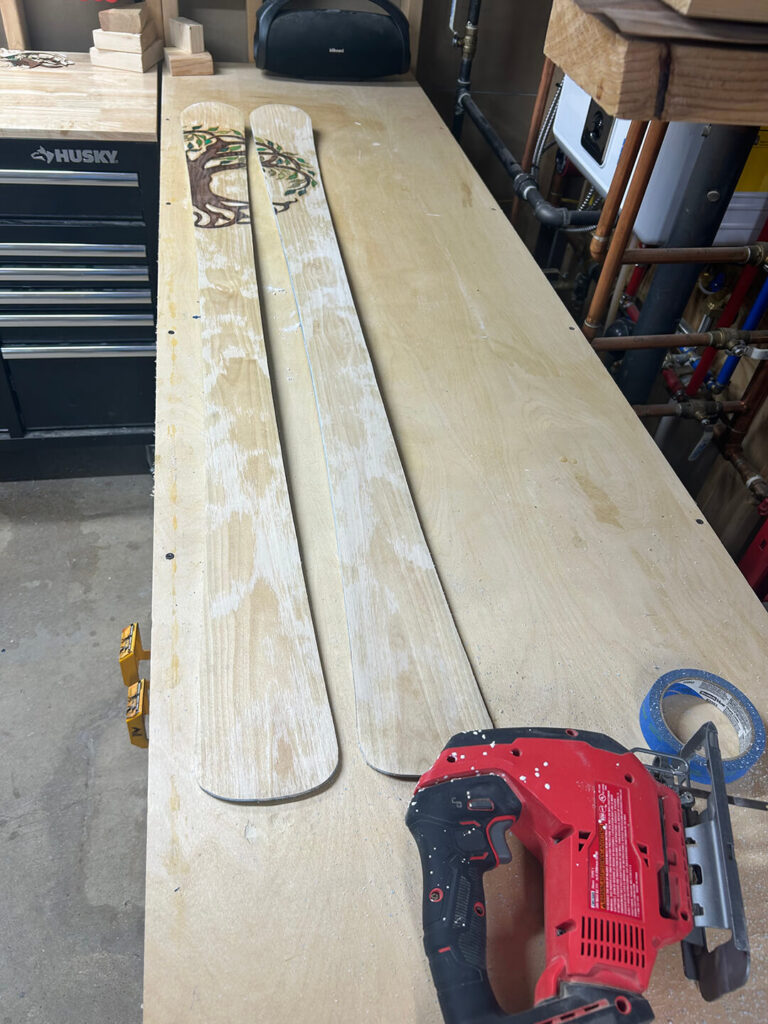
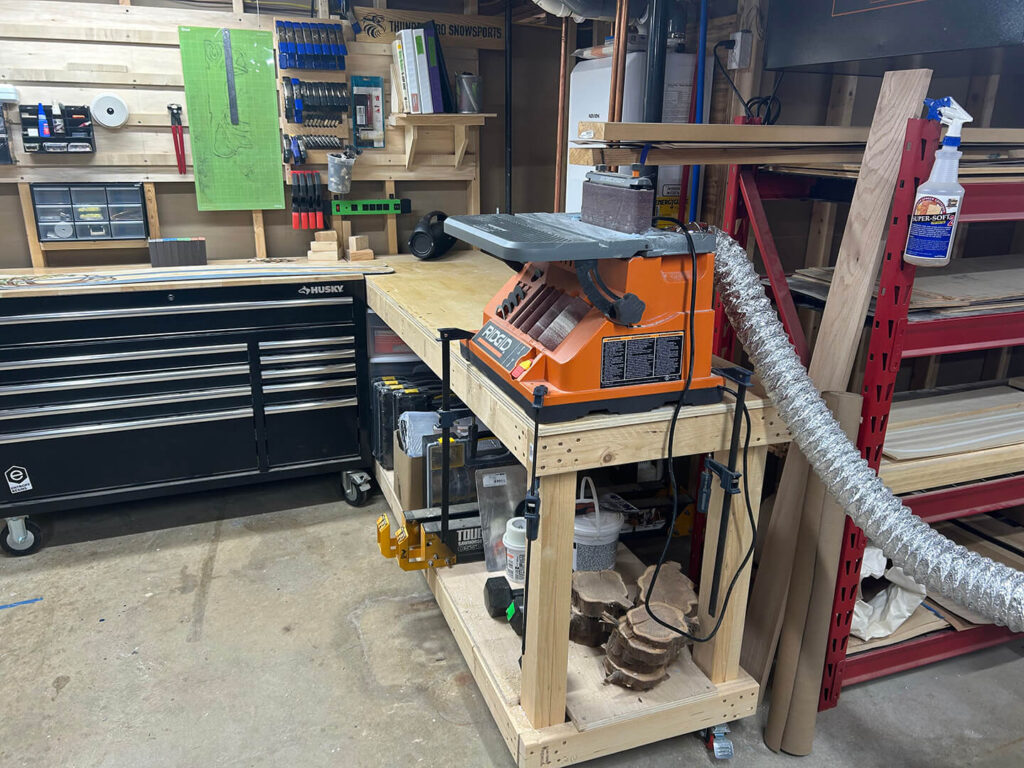
Rough Cutting and Sanding
Once cured, the skis came out as a solid “plank.” I rough cut them to shape with a bandsaw and jigsaw, then used a spindle sander to refine the sidewalls and bring them right to the edges as well as shape the tips and tails.
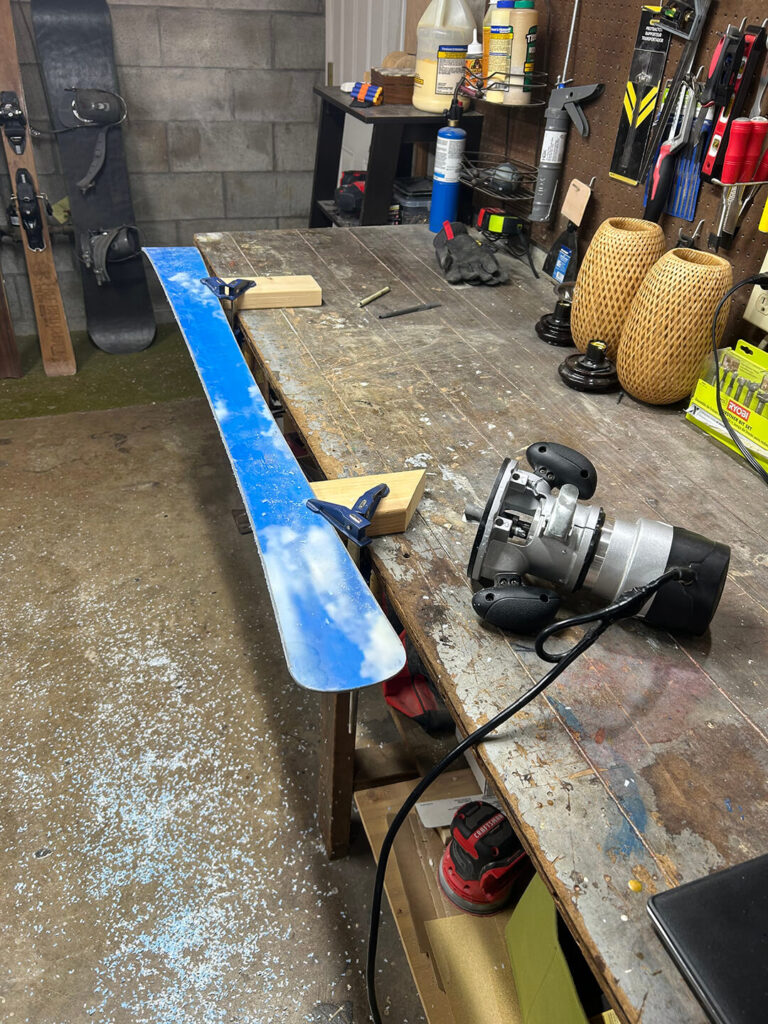
Final Touches
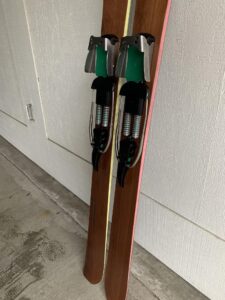
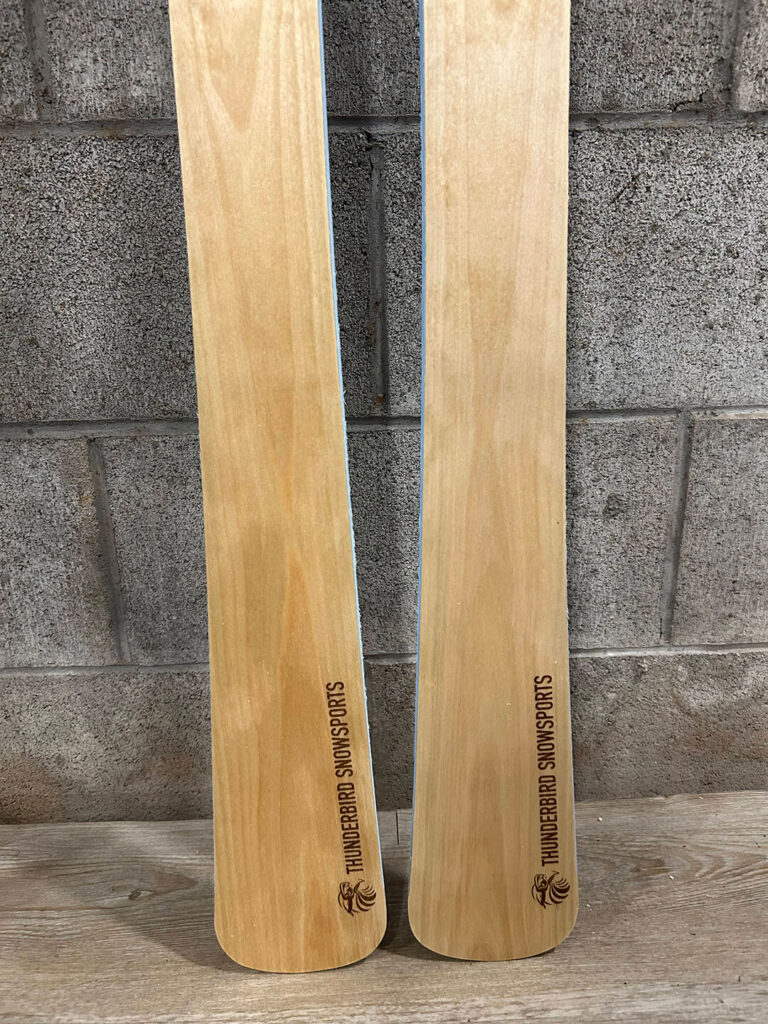
One of the last steps was routing a bevel into the sidewalls. This gives the skis the stepped shape making edge tuning easier. I also engraved my logo on the tails with the laser and applied multiple finishing coats to protect the veneer. The camber and flex felt great — the skis have a smooth medium flex tuned for her weight and style.
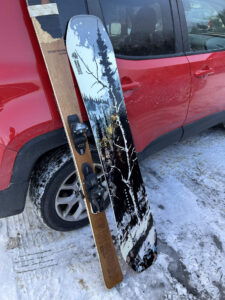
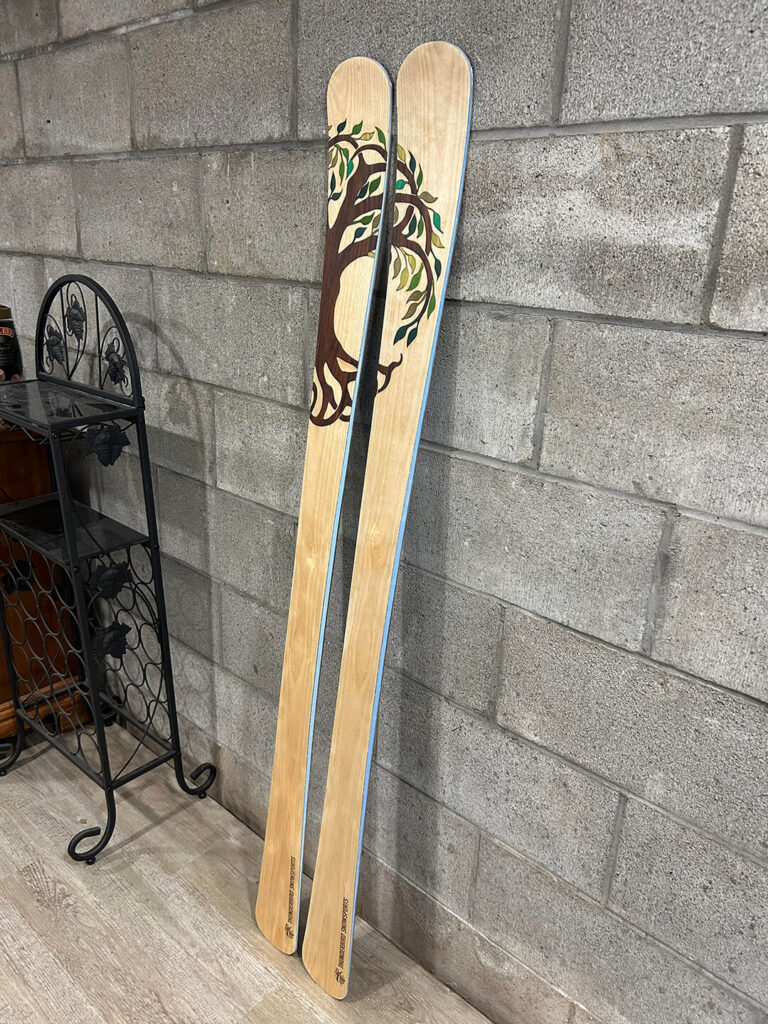
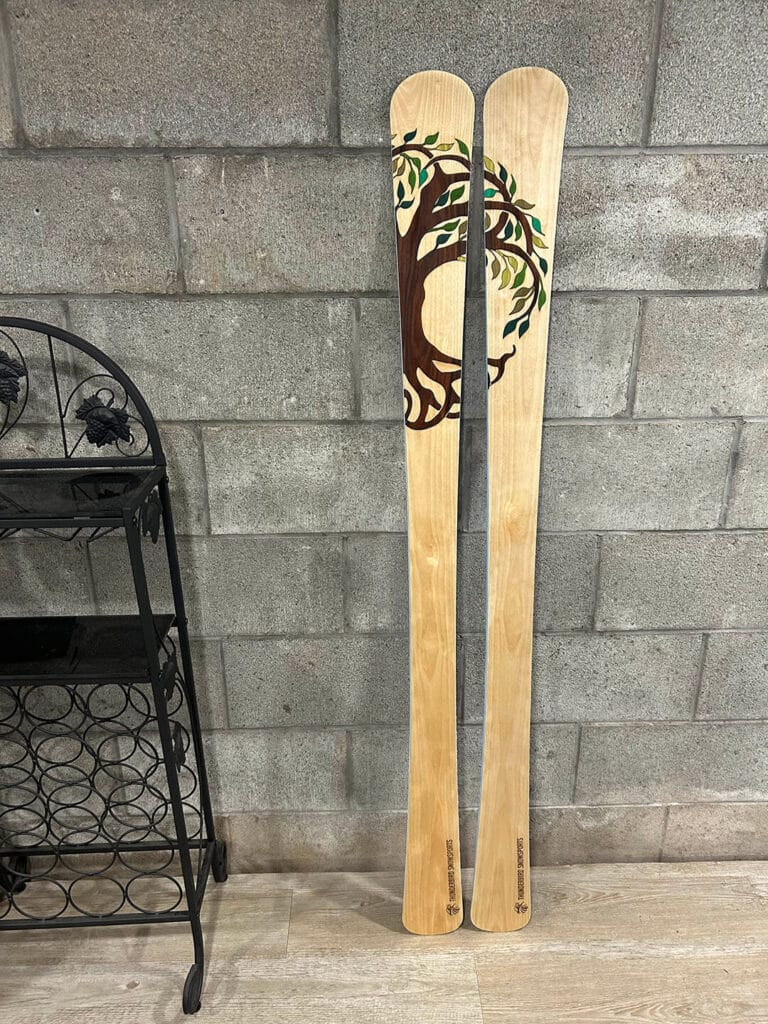
Finished Skis!
Here’s the finished pair, complete with the tree of life inlay. I’m really happy with how these turned out — from the veneer details to the cloudy bases. More importantly, she’s excited to get them on snow this season!
What’s Next?
With this project wrapped up, I’ll be shifting focus to my next build. Cheers!