Converting a Harbor Freight 2HP Dust Collector Into a Two-Stage Cyclone System
If you’re running a home workshop, you know dust collection is one of those things you can’t ignore. It’s not just about keeping the floor clean — fine dust is dangerous to breathe and flammable, it settles everywhere, from tools to finishes to electronics. For years I ran a Harbor Freight 2HP dust collector, which did the job but had a couple of big drawbacks: the stock filter bag lets a lot of fine dust through, and the single-stage design means chips and dust all slam directly into the filter, clogging it fast.
This summer I finally tackled a long-overdue project: converting my Harbor Freight dust collector into a proper two-stage system with a Wynn filter upgrade and a cyclone separator. The result is more airflow, and fingers crossed for far less filter cleaning.
Why Upgrade the Harbor Freight 2HP Dust Collector?
The Harbor Freight unit is popular in home shops because it’s affordable, easy to find, and powerful enough for most single-tool setups. But it has a few shortcomings:
- Stock bag filter – only filters down to 30 microns, so fine dust goes straight back into the air. Not great for lungs.
- Single-stage design – all dust and chips hit the impeller, then slam into the filter. The filter clogs quickly, reducing suction.
By adding a cyclone separator, most of the dust and chips drop out before ever hitting the filter. Pair that with a Wynn 35A pleated filter (1 micron filtration), and you’ve got a system that’s quieter, cleaner, and easier to maintain.
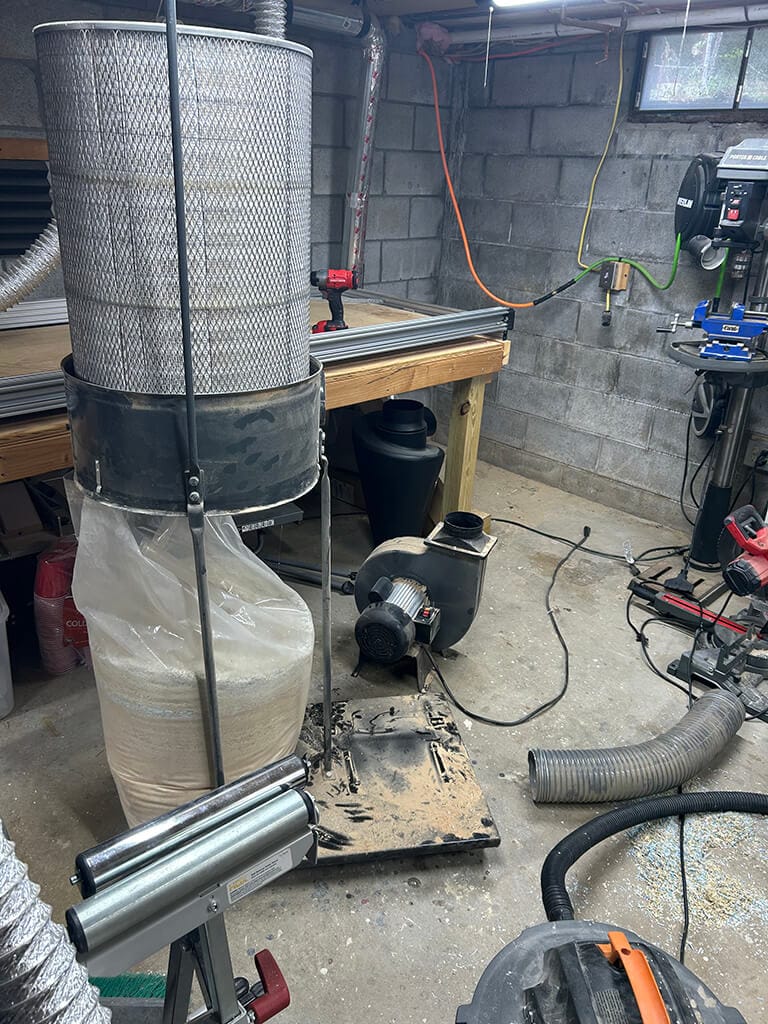
Step 1 – Disassembly and Cleaning
I started by tearing down the Harbor Freight unit completely. The blower motor, stand, and filter bag all came off so I could clean and reconfigure everything.
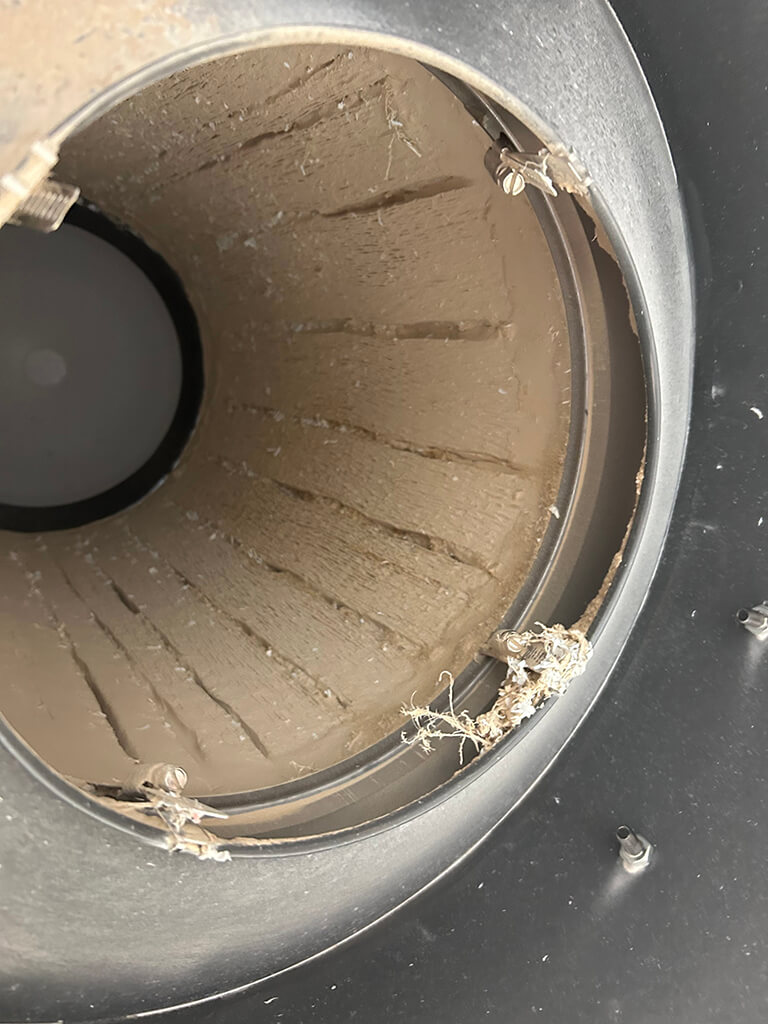
The filter in particular was caked with years of fine dust. If you’ve ever run one of these stock, you know the filter bag fills almost immediately and all kinds of debris and dust makes it’s way into the pleats. The cyclone will reduce how quickly this filter loads going forward.
I took it outside and used compressed air to clean it as much as possible, giving me a clean slate to start reassembling.
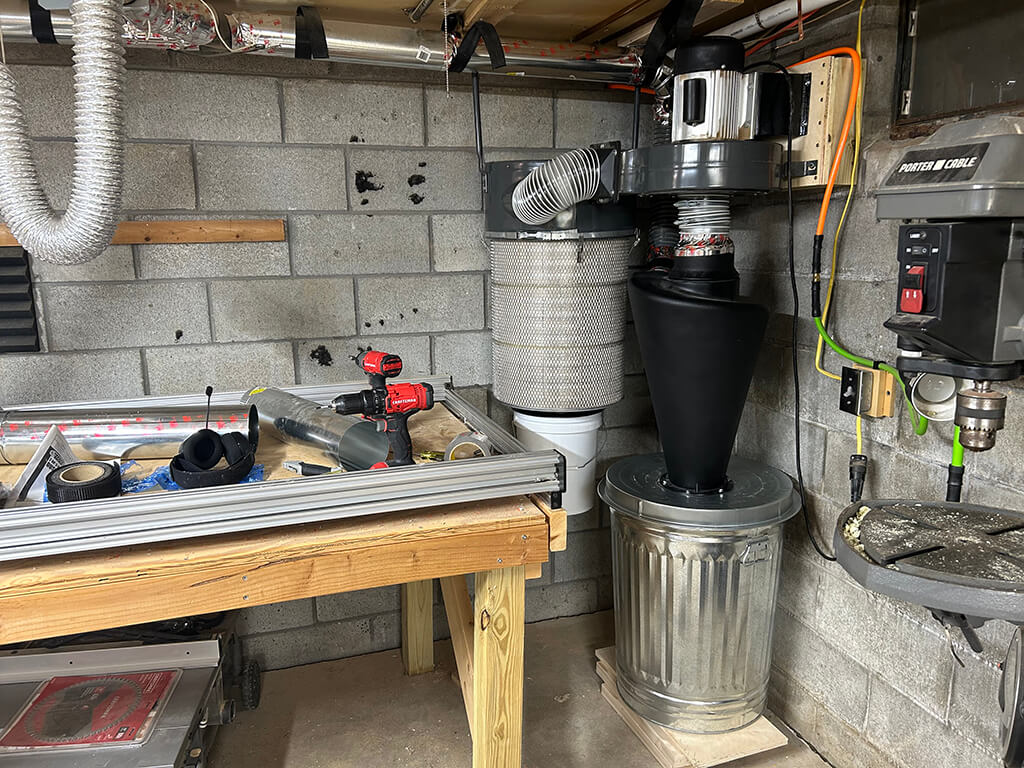
Step 2 – Mounting the Blower to the Wall
Instead of putting the unit back on its original cart-style stand, I decided to mount the blower directly to the wall. This saves floor space and makes the ducting run more efficient.
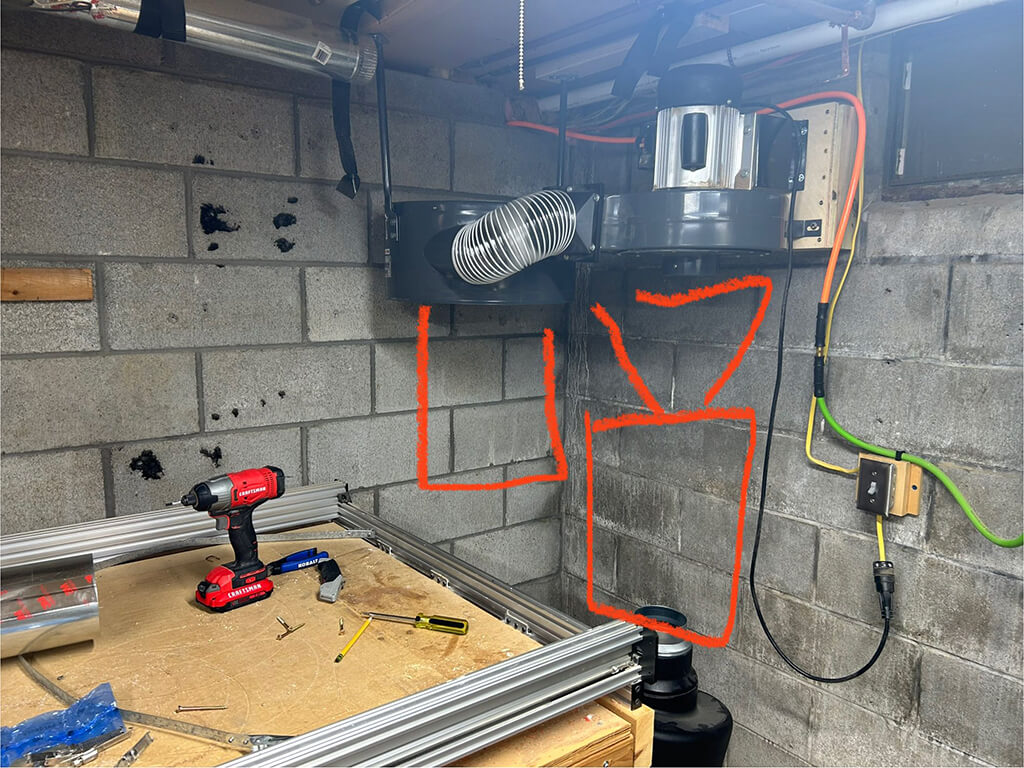
I also shortened the support legs for the filter and hung the filter mount from the ceiling.
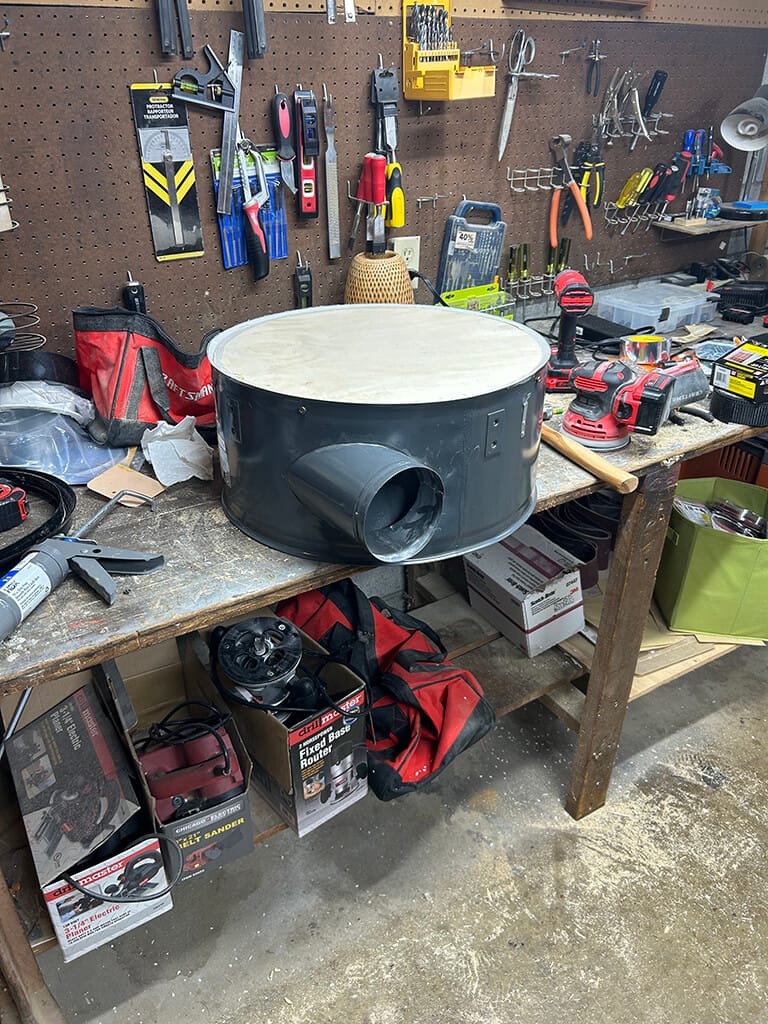
Step 3 – Modifying the Wynn Filter
I went with the 35A Nano filter, which traps particles down to 1 micron. Instead of reusing the Harbor Freight filter setup, I added a cap to the top of the Wynn filter mount and sealed it with silicone. I also cut a hole in the top of the filter itself to accept a threaded plastic bucket.
Step 4 – Building the Cyclone Stage
The new first stage of filtration. I used a steel trash can as the chip bin, paired with a black plastic cyclone (the popular Dust Deputy).
The cyclone mounts to the lid of the trash can and connects between the blower and the ductwork. Large chips and dust spiral down into the can, while only the finest particles continue on to the filter.
To make a tight seal, I cut a foam rubber gasket for the trash can lid. This is critical — even small leaks will severely reduce the separation efficiency.
Step 5 – Assembling the Two-Stage System
With all the pieces ready, it was time to connect them. The cyclone sits on top of the trash can, sealed with the foam gasket. The blower mounts directly above, pulling air from the cyclone outlet. The Wynn filter connects to the blower exhaust.
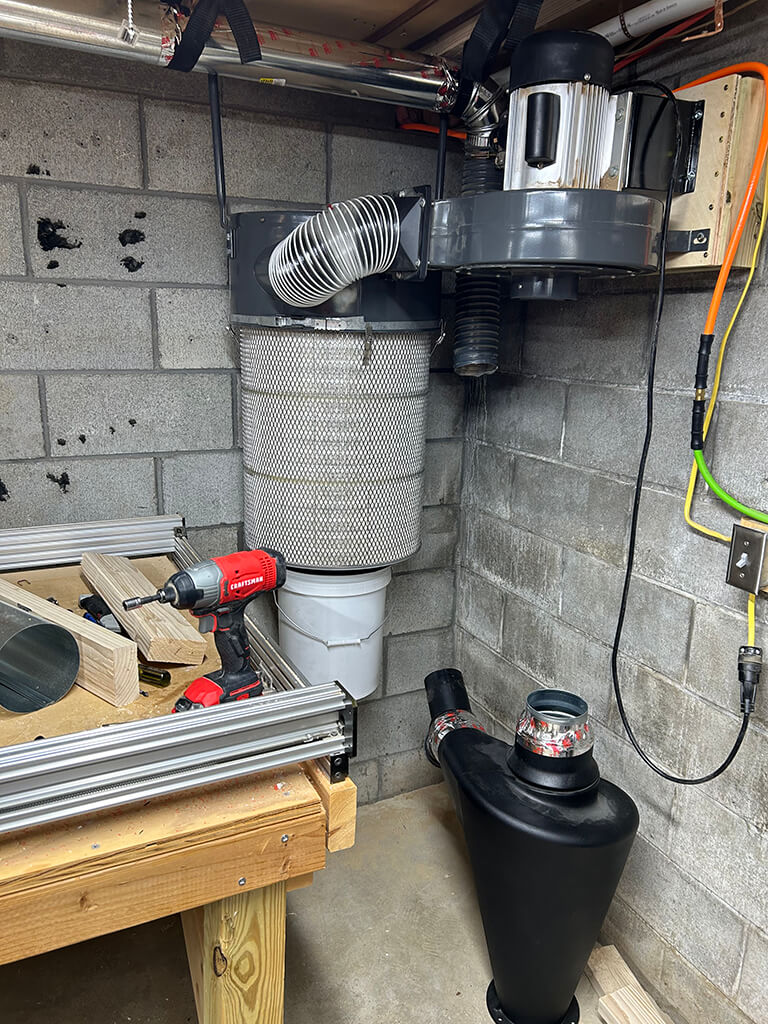
The final setup keeps everything compact: motor and blower up top, filter tucked below, and the trash can directly under the cyclone. The entire footprint is less than the original Harbor Freight stand but with double the functionality.
Performance and Results
The difference is night and day. Here’s what I noticed immediately:
- More suction at the tool – the Wynn filter has much less resistance than the stock bag, so airflow actually improved.
- Cleaner shop air – fine dust that used to hang in the air is now captured. Huge improvement when sanding or running the planer.
- Easier maintenance – instead of wrestling a dusty bag, I just pop the lid off the trash can and dump it.
Final Thoughts
If you’re running a Harbor Freight 2HP dust collector in your workshop, upgrading it to a two-stage system is one of the best shop improvements you can make. The combination of a cyclone and a Wynn filter mean less time cleaning, more time building skis and snowboards, and a safer, cleaner shop.