Laser Engraver Upgrade for Ski Topsheet Inlays
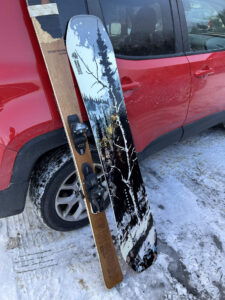
After the success of my Matterhorn marquetry topsheet, I wanted to take laser-cut veneer inlays to the next level. Not just decorative tips, but full-length engraved designs down the body of custom skis.
But there was a problem: my laser engraver only had a working length of 400 mm, nowhere near long enough for skis or snowboards. So I set out to build an extended laser system with an 8-foot travel length.
It took some trial and error and few trips to the hardware store, but I’m happy to say… it works.
This is the original machine:
The Base Laser System
My laser is a NEJE Master 2S Max (diode type), which came standard with:
- Controller: GRBL-based, compatible with LightBurn and LaserGRBL
- Cutting area: ~400 × 400 mm
- Laser module: ~30W input (~5W optical output)
- Frame: 40×20 aluminum extrusion
The Hardware Upgrade – 8’ X-Axis
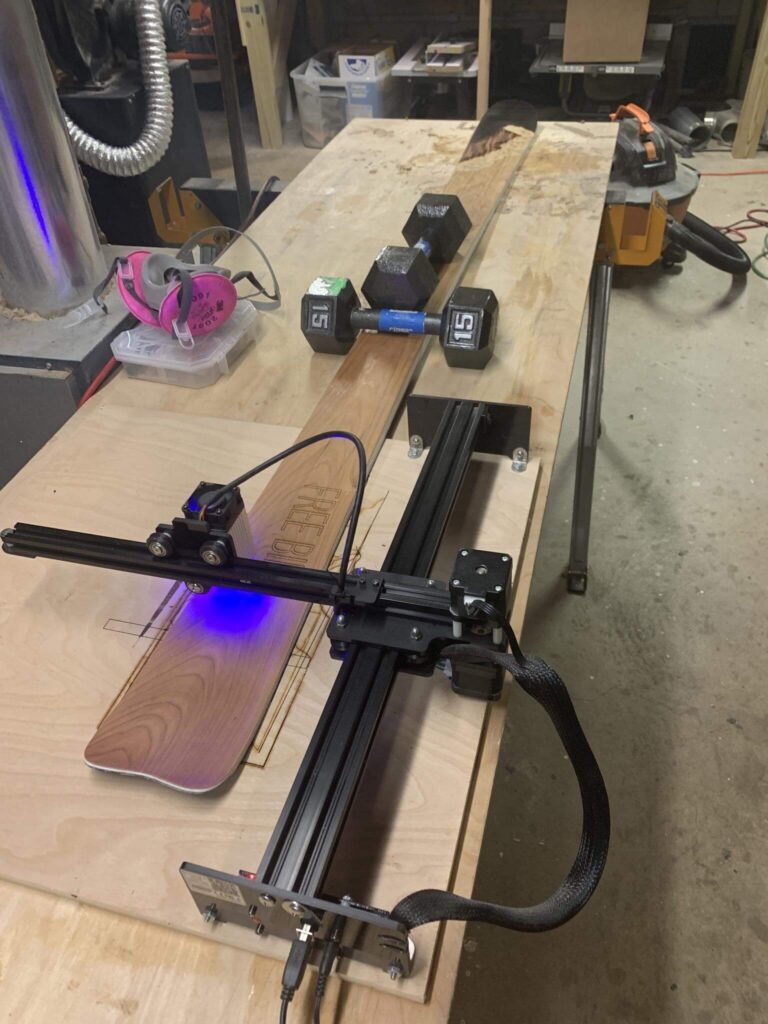
I replaced the original 40×20 aluminum extrusion on the X-axis with an 8′ extrusion from OpenBuilds. It’s the same profile, just way longer.
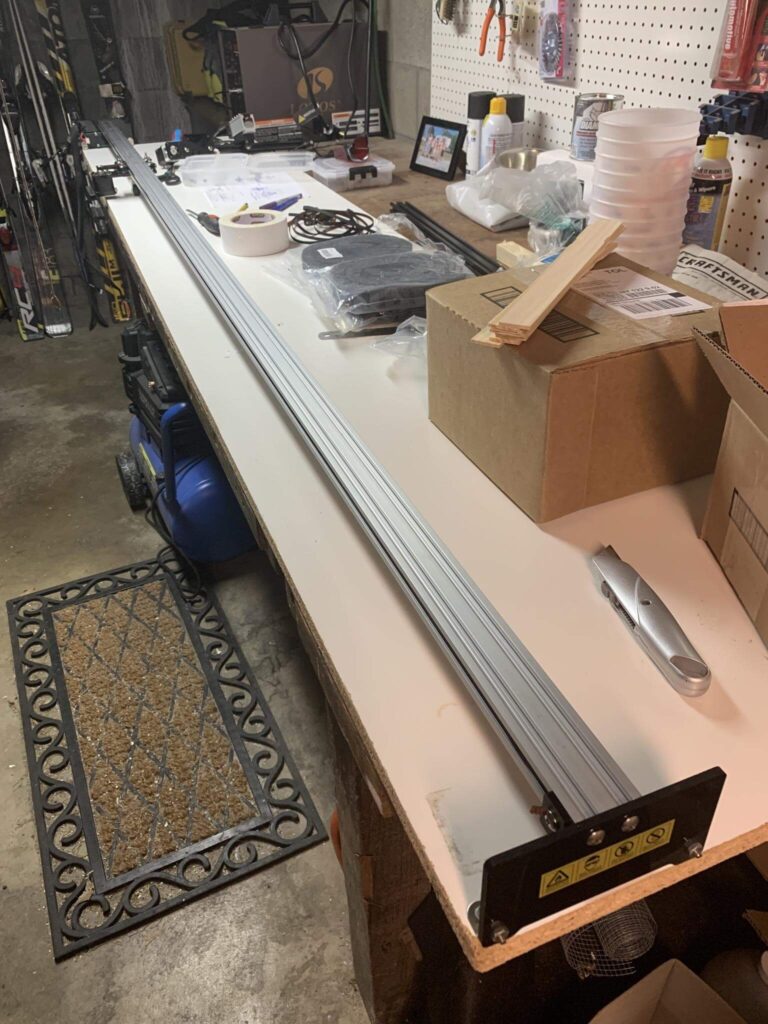
Problem: that much aluminum sags and flexes under the carriage weight, especially when the carriage is near the middle of the length.
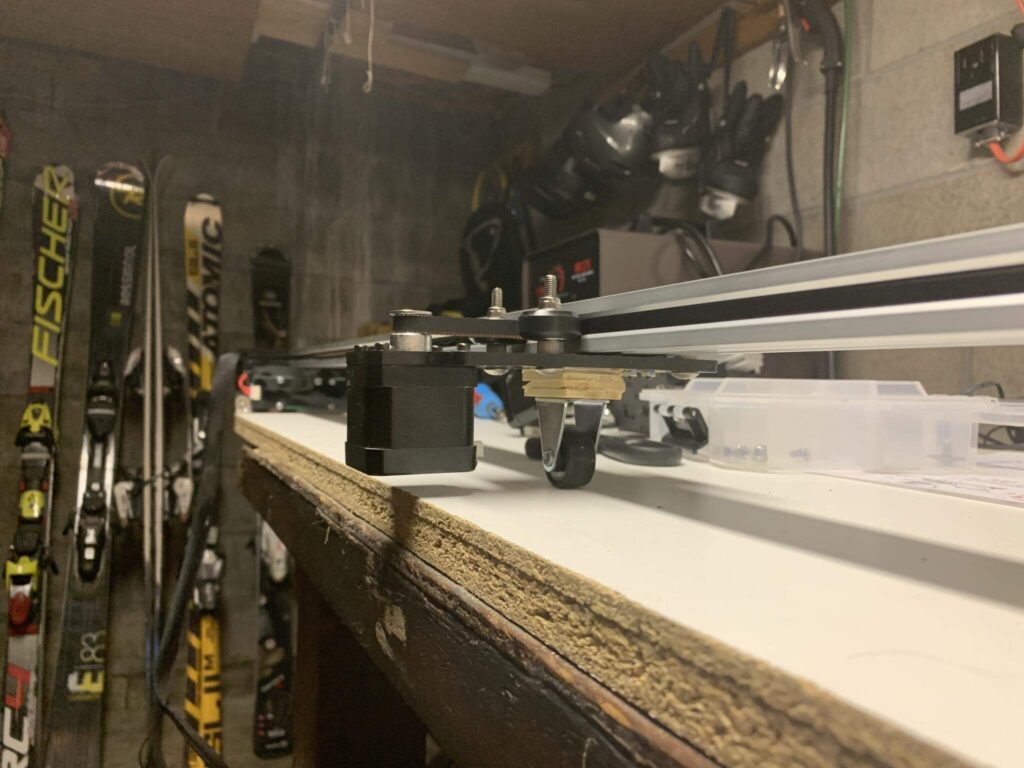
Solving Vibration with a Roller Wheel
To stiffen the long X-axis and stop the carriage from bouncing mid-run, I mounted a small roller wheel under the laser carriage. This simple support reduces flex and keeps the laser beam stable across the full lenth of the axis.
Wiring Up the Motors and Laser
Next, I needed to extend the wires for the stepper motor, limit switches, and laser head. I used:
- Zip-ties + drag chain (cable carrier) to keep things tidy
- Plenum-rated 4 and 6 strand cable
- heat shrink for all joints

here it is with the cat track rolling around!
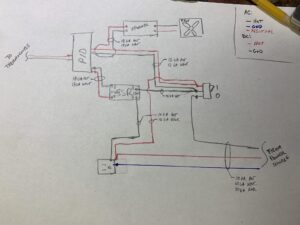
LightBurn Software Modifications
It took some trial and error but I made it work in lightburn which allows a custom dimension setup. There were a couple of really tricky settings to find/change to make it work too – the laser’s control board (grbl) has dimensional limits programmed into its hardware plc, and also I swapped the x and y axis and mirrored the y axis movement so that the screen orientation matches the physical orientation (y axis is the long one) as well that I had to update. Lightburn allowed me to make those changes and upload the configuration to the laser. I used this cheat sheet:
https://www.diymachining.com/downloads/GRBL_Settings_Pocket_Guide_Rev_B.pdf
- You can edit the GRBL settings directly in LightBurn
- I updated $130 (max X travel) to match my new bed size
- Changed the canvas size in LightBurn to match
After a bit of tweaking, I had full control over the entire 8-foot run. The laser tracks beautifully across the full length now.
here she is on her maiden voyage:
New Topsheet Inlay
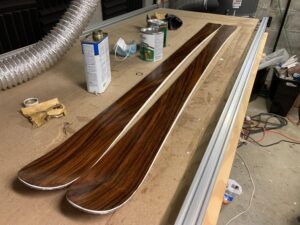
The first project on this new setup? A full-length engraved and inlayed veneer topsheet for my next pair of skis.
This design is much more complex than my Matterhorn tip — it spans the full ski and includes ~20 separate veneer cuts, plus engraving detail. After cutting each piece, I’ll use veneer tape to assemble them into a single panel before pressing.