Marquetry Topsheet Attempt #1 – Matterhorn Inlay and Powder Ski Rebuild
Taking a short break from shop time — I recently had ACL reconstruction surgery, which means no pressing or standing for a bit. But I’ve had time to post this exciting update, and plan for the next round of builds.
And this post is a fun one — I finally finished rebuilding my fat powder skis from the last post, and I tackled my first marquetry inlayed topsheet, using a traced photo of the Matterhorn from a past trip. Here’s how it all came together.
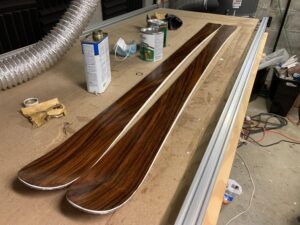
Let’s start with the redemption. In a previous post, I talked about cracking a mold block and tearing my silicone sheet while pressing a 187 cm pair of powder skis. Then the skis got ruined by the sidewall router. I rebuilt that mold, changed a few things (like tip block reinforcement), and re-pressed a new set with the same specs.
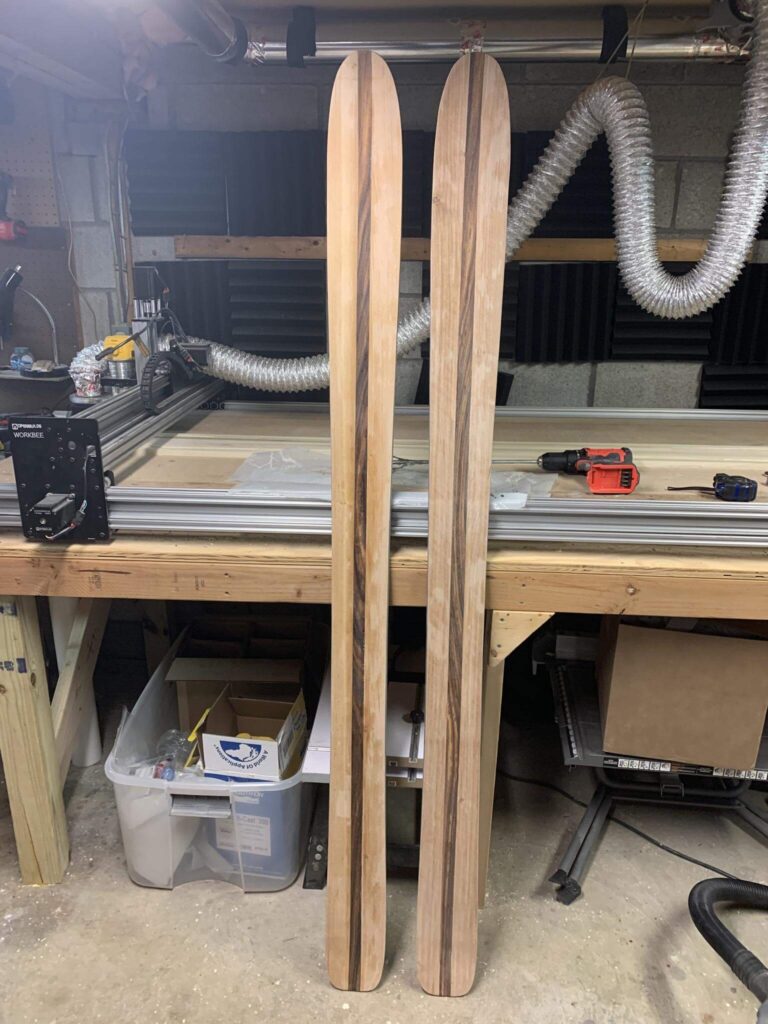
These skis came out clean and flat — just waiting to do the finishing touches: graphics, topcoat, and a tune. For the finish, I’m going to try Entropy CLR/CLX resin for better gloss and durability than my usual spar urethane or poly.
Introducing: Marquetry Topsheets!
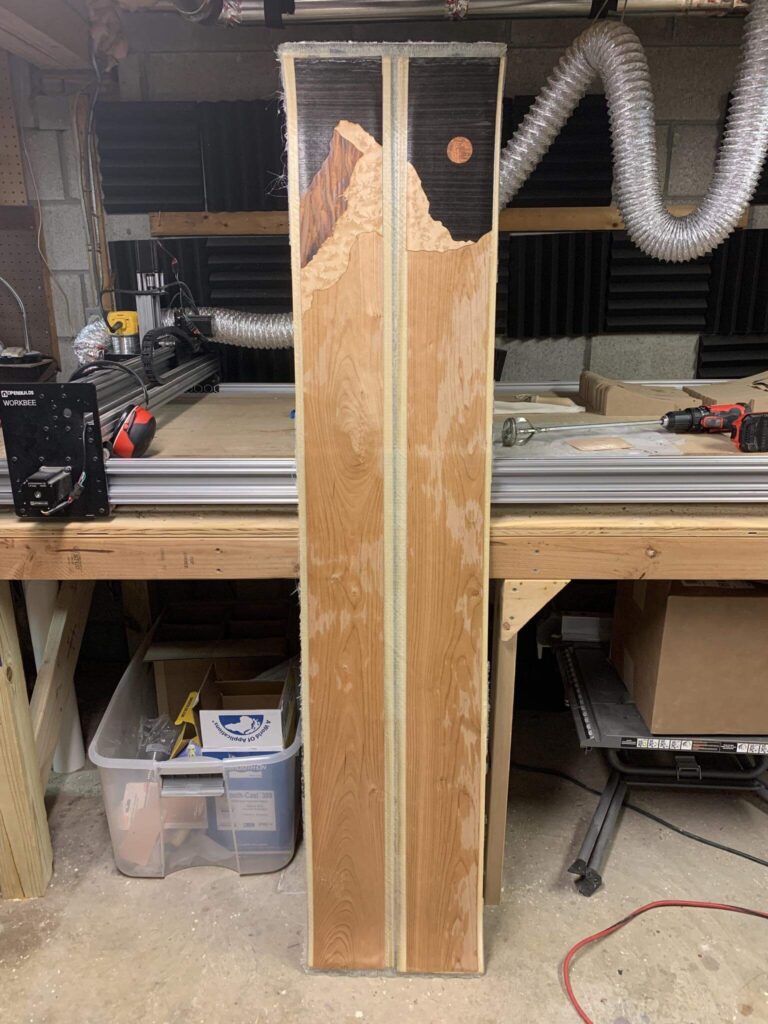
This next build is a big milestone for me — my first attempt at marquetry inlay in a ski topsheet. I’ve been experimenting with veneered designs for a while, but this takes it a step further into artistic woodworking.
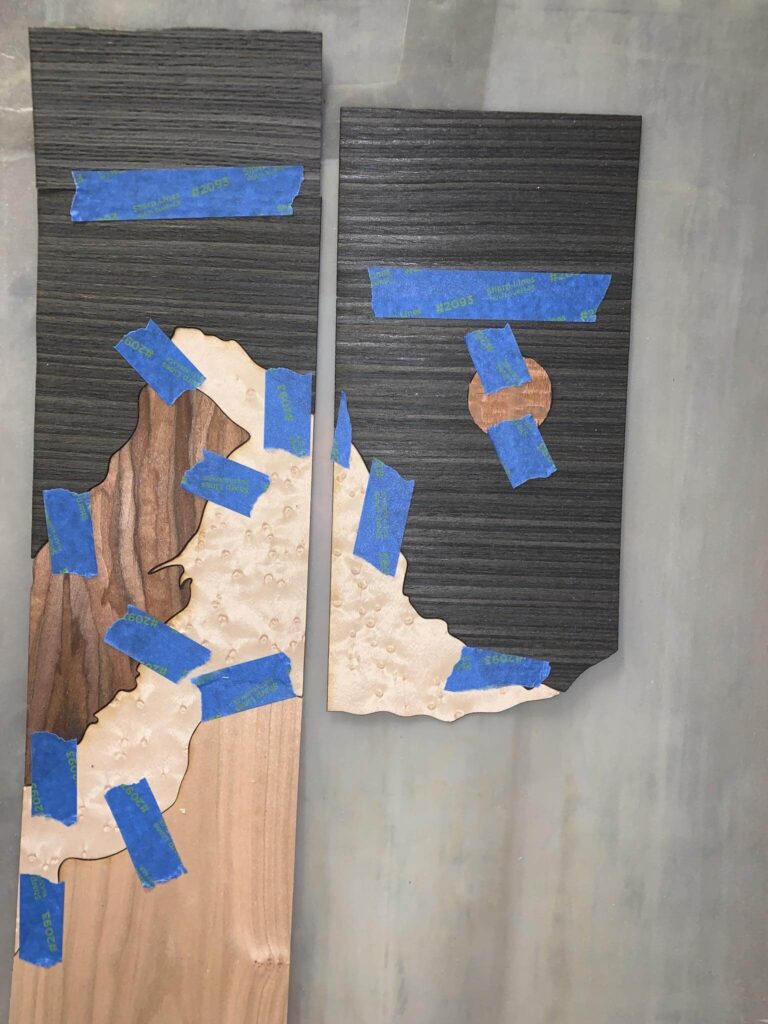
The design? A stylized outline of the Matterhorn, based on a photo I took while on vacation.
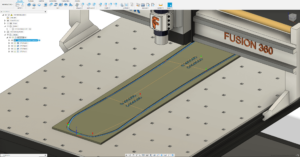
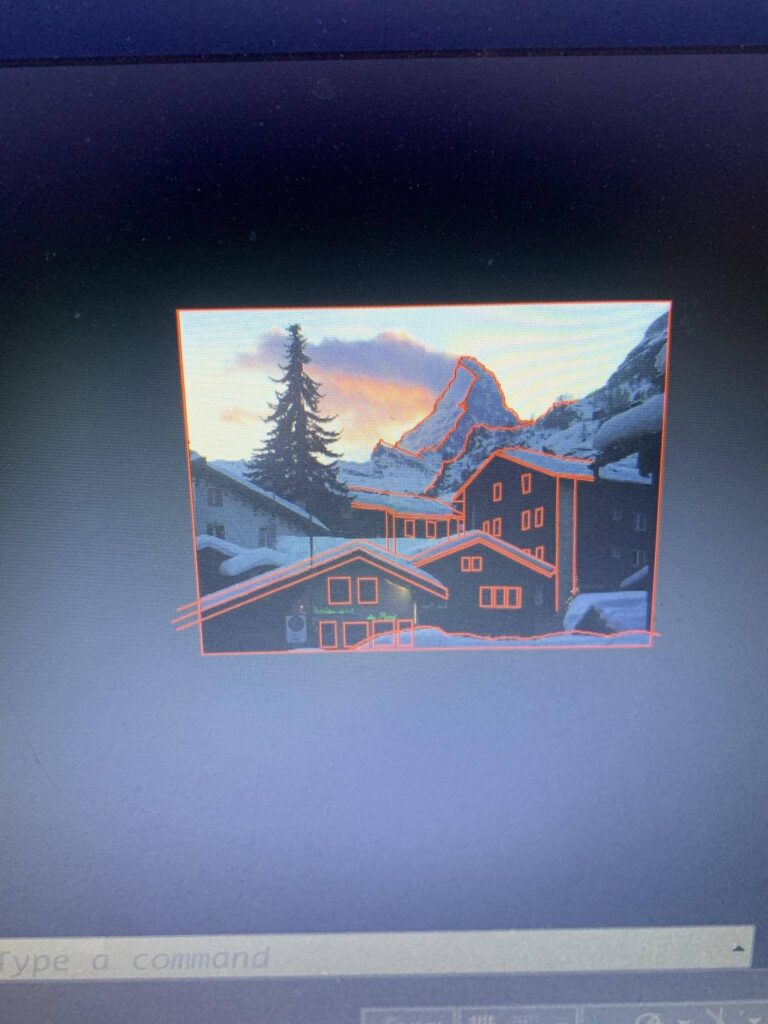
Step 1: Vector Trace in AutoCAD
I imported my reference photo into AutoCAD and manually traced the key features of the mountain to create closed polyline shapes. Each shape was exported as a separate DXF for laser cutting.
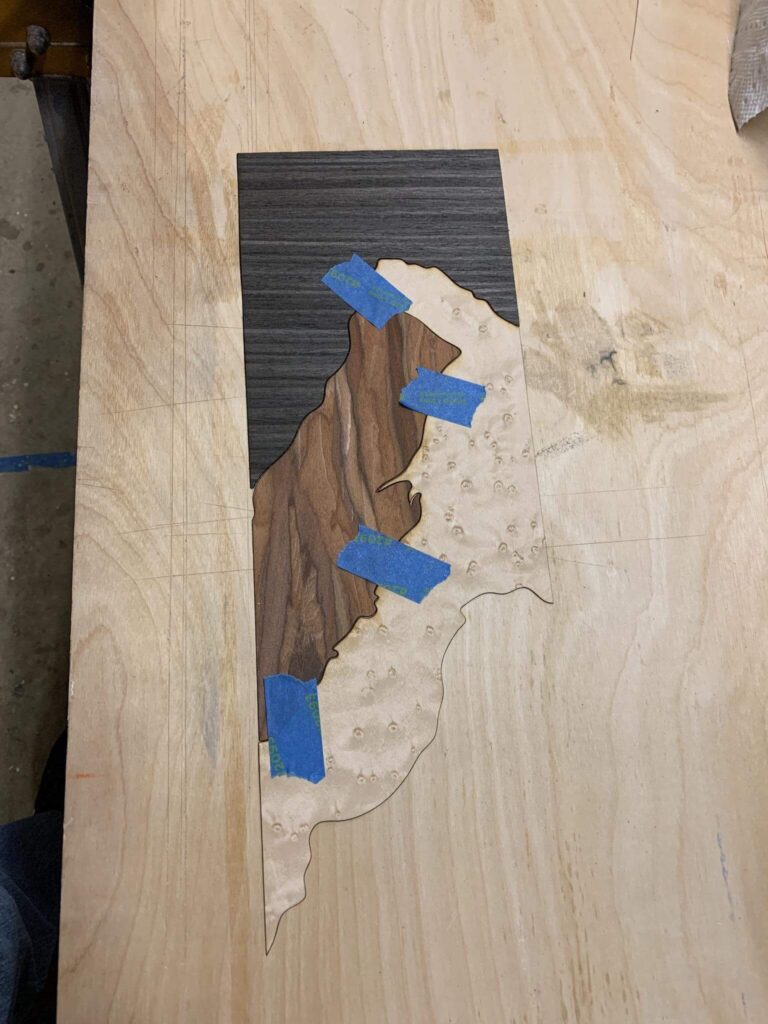
Step 2: Laser Cutting the Veneer
I selected several contrasting veneers and laser cut each piece of the mountain profile from the DXFs. This is basically like making a jigsaw puzzle with wood — precision matters. I used blue painter’s tape to hold the layout together temporarily.
Once the shapes were assembled, I flipped the whole piece face-down and taped the backside with veneer tape, using the veneer tape with holes in it to allow epoxy to squeeze into the joint and secure it during pressing.
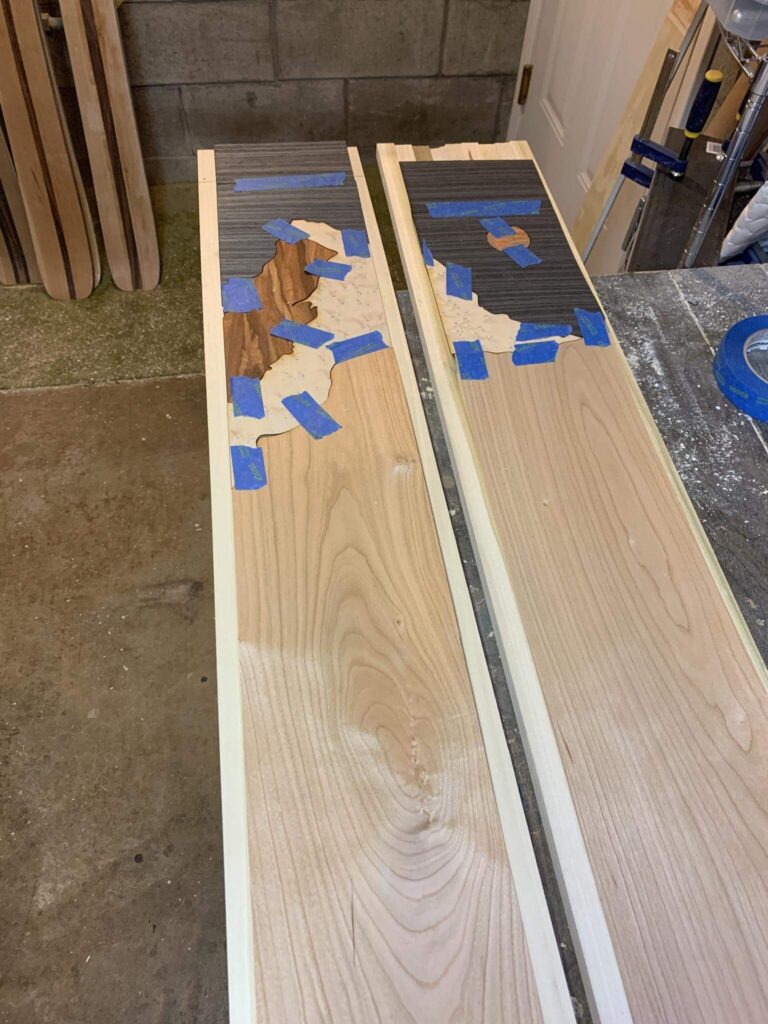
Step 3: Pressing the Inlayed Topsheet
With the veneer panel assembled, I added it to the rest of the layup:
- Base with edge wrap
- Bottom fiberglass
- 1” unidirectional carbon fiber stringer
- Core
- Top fiberglass
- Marquetry veneer inlay
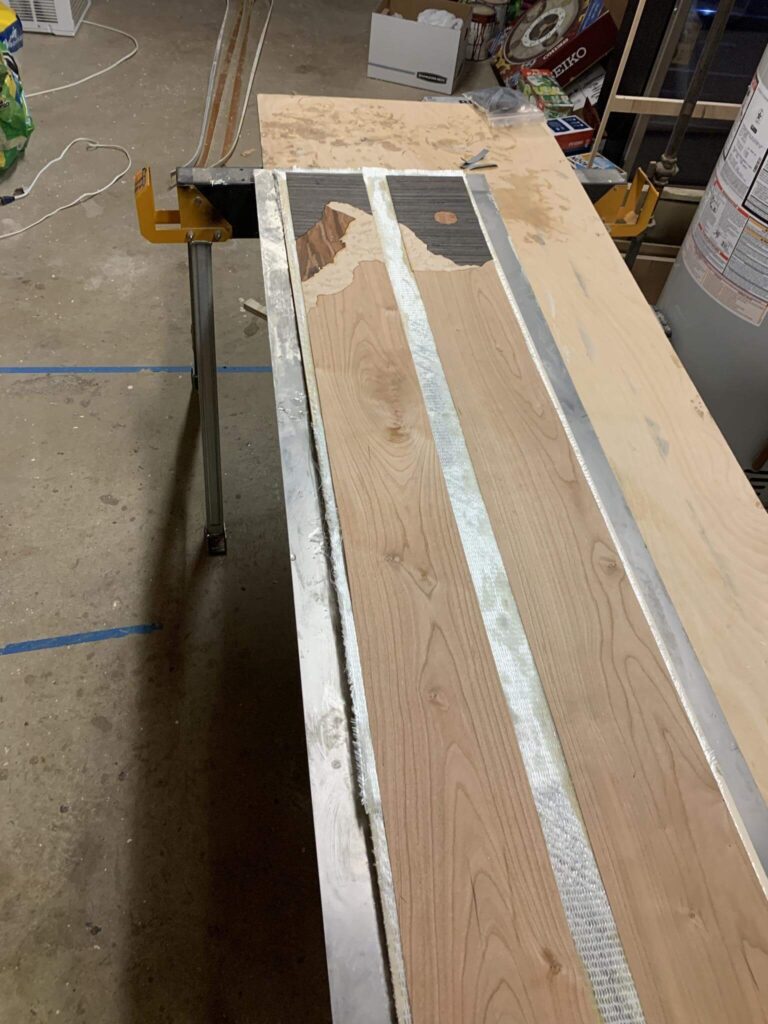
Then into the press it went:
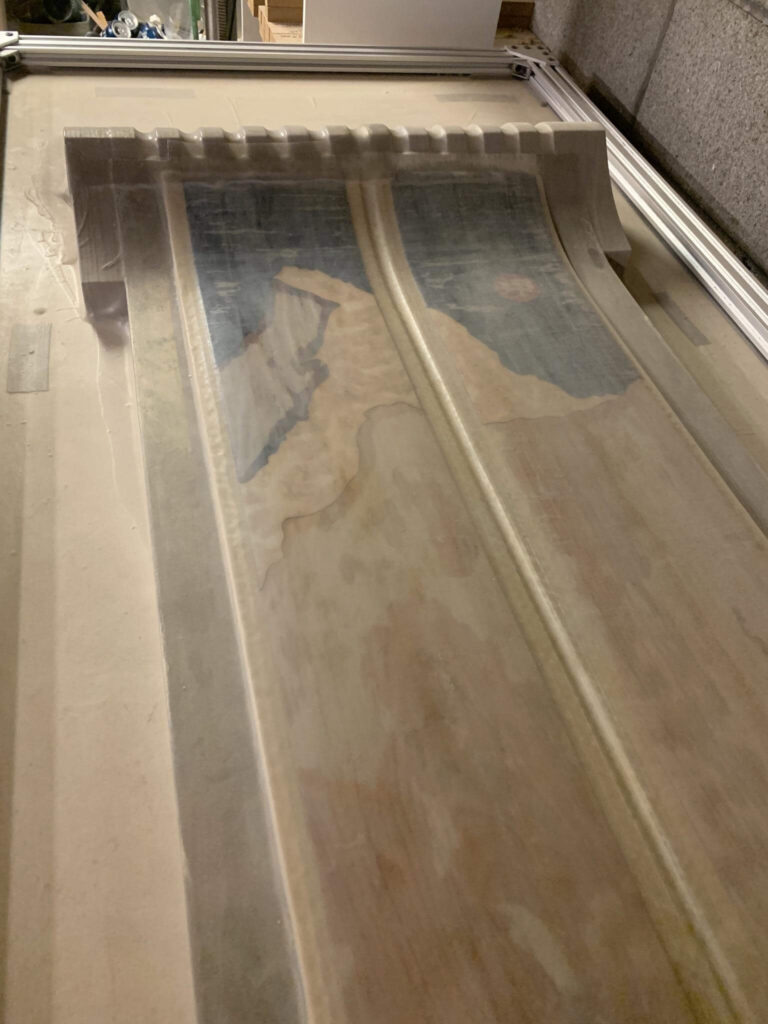
and here’s the result from layup!
The inlay held together perfectly — sharp lines, clean edges, and no lifting or distortion during curing. I couldn’t be happier with the outcome for a first try.
Build Specs for the Marquetry Skis
These are all-mountain skis with a medium radius and some extra width for versatility in variable snow.
- Length: 170 cm
- Waist Width: 95 mm
- Sidecut Radius: 17 m
- Core Thickness: 2.2/10/2.2 mm
- Core Material: Poplar with maple stringers
- Fiberglass: 20 oz triaxial top and bottom
- Carbon: 1″ unidirectional strip under core
What’s Next
Once I’m cleared to get back into the shop post-surgery, I’ll be cutting these skis out, sanding and finishing the sidewalls, and applying a topcoat to the veneer. I’m also planning to mount bindings and give them a proper flex and camber check.
Really excited to ride these — they’re my favorite build yet!